The first build that we started for the recent March RESPAWN LAN was the Comos SE “Beast” rig. This was a high-end build using the an MSI X99S Gaming 7 motherboard, Intel HASWELL-E i7-5930K CPU and MSI GTX980 Gaming graphics card, how could we call it anything else?
This was our most pre-meditated gaming rig, we deliberately went all out on performance components and we almost pulled off a system to behold but our shipment of a BenQ BL3201PT (4K) and XL2730Z (144Hz 2560×1440) didn’t arrive until 2 days after the LAN event which was shattering. None the less, gamers got to see how the “Beast” totally destroyed everything we threw at it in 1080p.
The build process was like Christmas Day and started with a delivery from the good folks at Cooler Master. They chipped in with heaps of kit for this one including the peripherals!
The components for this build were:
- Intel i7-5930K HASWELL-E CPU
- MSI X99S Gaming 7 motherboard
- Cooler Master Cosmos SE Case
- Cooler Master Nepton 240M CPU cooler
- Cooler Master V1000 Power Supply
- Kingston 16GB (4x4GB) DDR4 Predator 3000MHz RAM
- Kingston 120GB M.2 SSD
- MSI GTX 980 Gaming 4G
- Samsung 250GB Evo 840 SSD
- Seagate 1TB 7200 RPM Hard Drive
- Cooler Master Quickfire XT Keyboard
- Cooler Master Mizar Mouse
- Cooler Master Ceres 500 Headset
- Lamptron Blue 60CM LED strip
- Some custom vinyl work to conceal the unused drive bays
We started off with the Cosmos SE case and after we pulled it out of the box one of first things we needed to do was strip all the stuff we didn’t need and start as fresh as possible. The handles and skids on the Cosmos SE also support the case on it’s side so the right side panel doesn’t touch the bench when you’re working away inside it. The top panel comes off with one thumb screw and the side panels have 2 thumbscrews each. The designers clearly had system builders in mind with the Cosmos SE – it was so easy to work with.
We don’t need all the drive bays at the front so thankfully it was just a matter of just removing six screws for the housing after we removed the 6 trays. We decided to only use the 2 drive bays at the bottom for a mechanical hard drive and a 240GB SSD. We also had the opportunity to use a Kingston M.2 SSD fitted to the motherboard which meant one less set of power and data cables. The Kingston m.2 drive worked a treat as the boot drive in this build – see the full review here.
Rather than having the cables coming our of the back of the drives into the case, there was a bit of room at the front of the case between the drive bay and the front grill where we can run cables in a way that you can’t see though the window or with the side panel off. This approach kept the floor in the case clear and neat.
The next thing we did was to take the top 140mm exhaust fan out because of the Nepton 240mm radiator that we would be installing later on.
At the rear there is 120 mm fan but the cable comes out at the bottom right-hand corner, (as you look at the case upright from the inside), we actually need that to come out the top right hand corner so it’s as far back as possible and the shortest distance from the motherboard tray routing holes as possible. This was a simple matter of undoing the 4 fan mounting screws and rotating the fan frame 90 degrees anti-clockwise. Once we did that it makes it a lot easier to run the cable without the rear IO shield not getting in the way and we just feed the fan cable round on the motherboard and put onto a fan header.
With the three fans left in the case, we went around and removed all the MOLEX power connectors because we planned to run the fans off the motherboard headers and control their speed via the MSI Commander software so they can spin up and spin down as the airflow is required not run at a constant speed.
Then we moved on to the power supply. There are only 4 screws involved here and it’s pretty straightforward. As always, there is a choice of orientation – ie. a choice of fan up or fan down. The Cooler Master labelling is pretty agnostic but the choice came down the modular cable ports and us wanting the motherboard and CPU PSU connectors on the power supply at the back, as close to the rear grommet as possible. This makes it easier to route the larger/thicker cables straight through the grommet but also easier to add or remove peripheral or PCIE power cables later. This decision meant having the fan face down. The Cosmos SE case sits up relatively high off the desk/floor thanks to the skids so there was no hesitation when we went ‘fan down’.
We also pre-installed the Kingston M.2 SSD the Kingston DDR4 Predator memory on the MSI X99S Gaming 7 board. The Kingston Predator DDR4 RAM is a great piece of kit, we simply installed the Kingston Predator RAM into the board and then when we booted up, we went into BIOS and hit the XMP option and BAM! 3000MHz on our memory which gave us a nice 125MHz base clock on the CPU and some overclocking goodness.
At the time of initial assembly, we didn’t have the Cooler Master Nepton 240M or MSI GTX 980 so we decided to stage the system with what we had available. This meant that we installed the Noctua NH-U14S and MSI GTX 760 HAWK for initial software installation. With a working platform, we just had to install the game updates and software that we need on our 120GB Kingston SSD, additional Samsung 250GB 840 EVO and 1 TB 7200 RPM hard drive.
As most of the power leads and cables were in place, we considered how the case was going to look with regard to cable management after the last components arrived in the final week before RESPAWN LAN. We knew that it wouldn’t be too hard to get everything looking pretty neat as Cooler Master did a good job with the design of the Cosmos SE. In the meantime, we used some wire/twist ties which are basically like bread ties to keep cables in place and aligned with the case anchor points. When we got closer to the event and all the permanent components were in place, we went around and replaced all the twist ties with some black zip ties and made it all secure.
A week out from the event, we received the Nepton 240M and the GTX 980 Gaming 4G and finished the build off. I was surprised at how fast it all came together and in less than 45 minutes, the build was complete and we were rocking some serious gaming grunt.
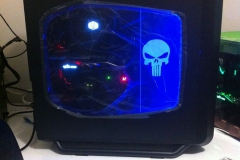
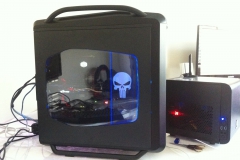
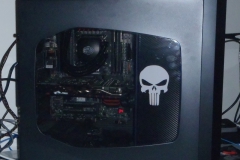
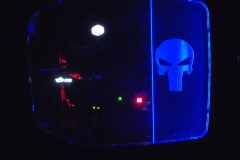
The artwork for this build wasn’t as sophisticated as our Minecraft Node 804 but we thought subtle might be the order of the day for the Beast. Having removed all the drive trays, we wanted to block off the empty cages from the window and give it some personality. The options we considered involved a panel or other method to screen the drive cages out and provided the opportunity for some lighting, a logo and some carbon fibre wrap that I’d been wanting to check out for a little while.
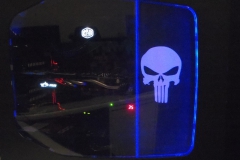
The process was really simple and involved just cutting a panel out of really thin (3mm) craft wood that I had in the workshop, then covering it with some carbon fibre wrap from an automotive enthusiast supplier and adding a white ‘Punisher’ skull decal to it to pick up the LED colour. Once this panel was fitted and held in place with 2 hidden pieces of 3M double sided tape, we went about installing the blue LED strip. This just ran around the upper, front and lower edges of the drive cage providinhg indirect light with the strip hidden from view. The result was a blue highlight and subtle but effective case art. The Cooler Master Nepton water block, MSI X99S Gaming 7 and MSI Twin Frozr V cooler have LEDs that also shone through the window to give some nice ambient light without it being over the top. In order to keep the window in pristine condition, we left the plastic film on until the day of the event.
This project was a lot of but and our neat and tidy accented Cosmos SE build had the most “gaming grunt” of any system I’d built in the past. Unfortunately it was hard to get a clear photo of the lighting and these shots don’t really do it justice but we were really pleased with the way the vinyl panel behind the Punisher skull picked up the blue LEDs from different angles.
The Cosmos SE is a really nice case, a cheaper price tag and smaller but more practical size than the larger Cosmos II but it still has the skids and handles that define a ‘Cosmos’ case. At $185, the Cosmos SE is by no means a cheap case but it has a lot of features, is great for cable management and looks badass. The blue lighting works well with it and we simply extended the theme to make a feature of the side window. Working with the Cosmos SE was an absolute pleasure and I’d happily use it again. The V1000 power supply is completely modular and remained quiet under load – the best part was the flat modular cables and how it made for a very neat and tidy build. The fans on the Nepton 240M hardly went above idle which made the whole build very quiet on the ears.
In terms of peripherals, the Cooler Master Mizar mouse, Quickfire XT mechanical keyboard with Cherry red switches and Ceres 500 head set just capped off an awesome gaming platform for RESPAWN LAN and we’d like to extend a big thank you to Cooler Master for supporting this project.
At the LAN event itself, the Cooler Master sponsored Beast was constantly in use and a good example of what you can achieve with minimal effort and some attention to detail. Our key was component selection, careful installation/cabling and sticking to the plan of ‘less is more’ in terms of lighting.

