Construction / Quality
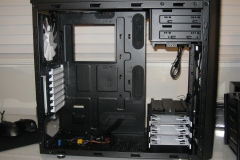
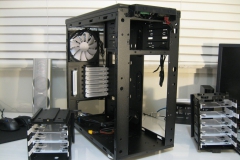
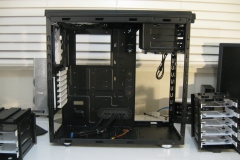
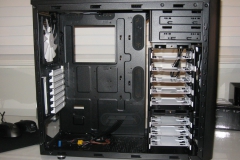
The powder coat and general finish on our unit was flawless. The front panel is plastic with a black brushed aluminium look. The case feet have rubber pads and are silver/chrome in appearance. As usual, we looked at the specifications once we had the Arc Midi R2 out of the box and went around it checking out each feature. The case feels well thought out with cable management, SSD holes, drive bay options and anti-vibration measures practically implemented. Finding everything to be as advertised, I proceeded to pull all the panels off and remove the drive bays to get a better look.
Case Panels
Unlike the Define R3 and Define R4 cases, there is no sound dampening bitumen incorporated into this case. With a window on one side and nice wide grills to provide high airflow, the inclusion of bitumen would have likely been of no benefit and just added unnecessary weight. What this does mean is that there is a smidge of extra room behind the motherboard tray for cable management – our view on this is that every millimetre of clearance behind the motherboard tray counts and Fractal Design gives you 26mm in the Arc Midi R2.
Whilst the front panel simply pulls off, the side and top panels lock in and are secured with thumb screws.
Side Panels
Both side panels are pretty standard with the right panel being plain and the left having a dark tinted window. The dark Perspex window makes it harder to see into the case but allows any internal lighting such as our Raystorm water block and any UV reactive material to stand out when the PC is switched on.
Front Panel
This caught us a little by surprise but the front panel is all plastic except the removable mesh filter and pulls completely off the case without any screws. The fans actually screw into the removable panel rather than the chassis. There are mounting holes for both 120mm and 140mm fans, and either 120mm or 240mm radiators. The mesh panel has two press button fasteners at the top and tabs at the bottom to hold it in place. It takes about 5 seconds to remove the grill for cleaning and about the same if not less to put it back once you have cleaned it.
Top Panel
The top panel is held in place with 2 thumb screws at the rear and slides back about 10mm and then lifts off. The grill and dust filter is not removable but forms the lion’s share of the top panel anyway so you would remove the panel, give it a once over with the vacuum cleaner and re-fit it when done.
There is space in the roof for 2 case fans or a radiator. We had to remove the radiator fans to easily access the top row of motherboard screws but our EX240 radiator was able to stay in place while we removed the motherboard for leak testing and then re-installed it once the testing was completed. The offset mounting holes made radiator placement really easy in our practical build exercise.
The front IO panel is part of the case and stays attached permanently. There are two USB3 ports, headphone and microphone jacks as well as a power button, reset button and lights for power (blue) and HDD activity (red).
Drive Cages
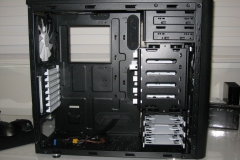
The Arc Midi R2 is really easy to work with and the middle drive cage just slides out with the removal of 2 thumb screws. The bottom drive cage is also removable but it takes a little more commitment from the system builder. There are 2 screws into the front of the case and 4 in the floor, and if you want to move the bottom drive cage, then you might also want to remove the top off the actual cage itself which is another 4 screws.
One of the nifty things about the bottom drive cage is that the floor screw holes appear to be the same as the mounding holes on a standard 120mm fan and you can mount it in 3 different positions. Once we decided to mount our radiator in the roof, we left the lower drive cage in the default position and just removed the middle cage to give maximum, unimpeded intake airflow to our system.
The drive trays are just like the ones used in the R3 and R4 Define cases. These are easy to use, support both SSDs and mechanical hard drives, have rubber vibration dampeners for the screws and come in a contrasting white finish.

