
Ryzen is here and we’ve seen the number of AMD boards on the market increase exponentially with the new AM4 socket. Selecting one for your next AMD system is an important decision because the socket is likely to stick around for a while which means that you could be entering into a long-term relationship. MSI hasn’t made selection easy with a massive choice of AM4 boards but we found the enthusiast gamer’s sweet spot with the X370 Gaming Pro Carbon.

AMD’s AM3/AM3+ socket stuck around since 2009 which has been a great innings. Motherboard manufacturers were still making new 990FX series boards as late as last year to support a chipset and socket that was being replaced. How is this relevant? Longevity – There are gamers out there that were able to upgrade their CPU without changing their board during that time. The relatively rapid succession of socket changes we see from Intel in the 115x socket has been frustrating at times but a necessary evil due to the performance gap between Intel and AMD’s previous generation of CPUs. The game has now changed with Ryzen. The X370 is the enthusiast AM4 chipset that allows overclocking and the top performance options in terms of bandwidth and expansion. Gamers can buy an enthusiast board like the MSI X370 Gaming Pro Carbon with those extra bells and whistles at a reduced risk of buyer’s remorse knowing that the Ryzen 5 1500X CPU they can currently afford could easily be upgraded later to something with more grunt without the need to change the rest of their platform. Time will tell if this hurts AM4 motherboard sales as new generations of AM4 socket CPUs are released and people actually start upgrading.
In April I had the opportunity to see the full line-up of AM4 motherboards from MSI at an event in Melbourne. The line up was extensive and perhaps a little excessive as MSI appears to have targetted every price point in the market from the cheapest business/home office requirement to the mad scientist tweaker. The upper mid-range is probably the X370 Gaming Pro Carbon and at $279 you do get a fair bit for your money. MSI went all out in terms of features that will appeal to gamers and didn’t worry about additional power connections or crazy overclocking features that most of us won’t use and shouldn’t have to pay for. This board is pitched at gamers who take their tech more seriously than casually – and they nailed the brief perfectly.
The features are extensive, the aesthetics are somewhat restrained but still edgy and the performance is exactly what we expected from an enthusiast product.
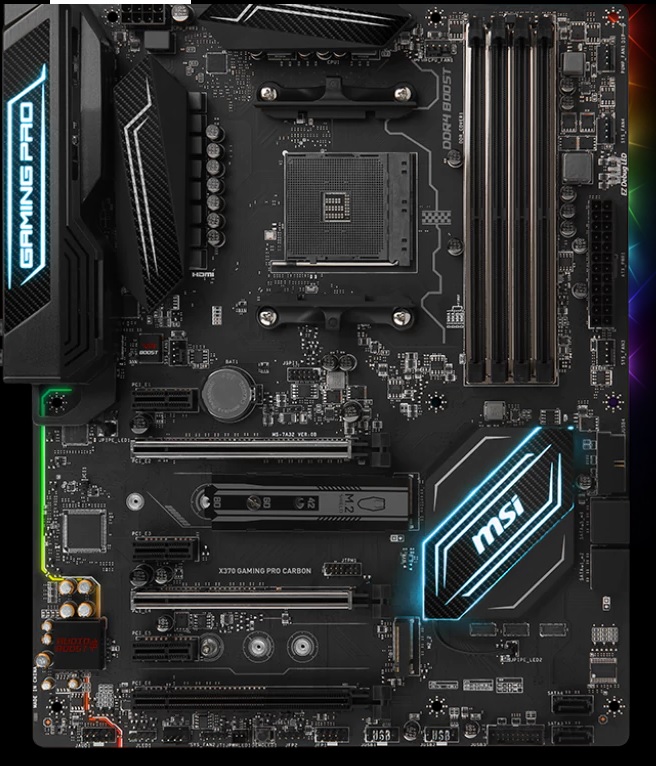
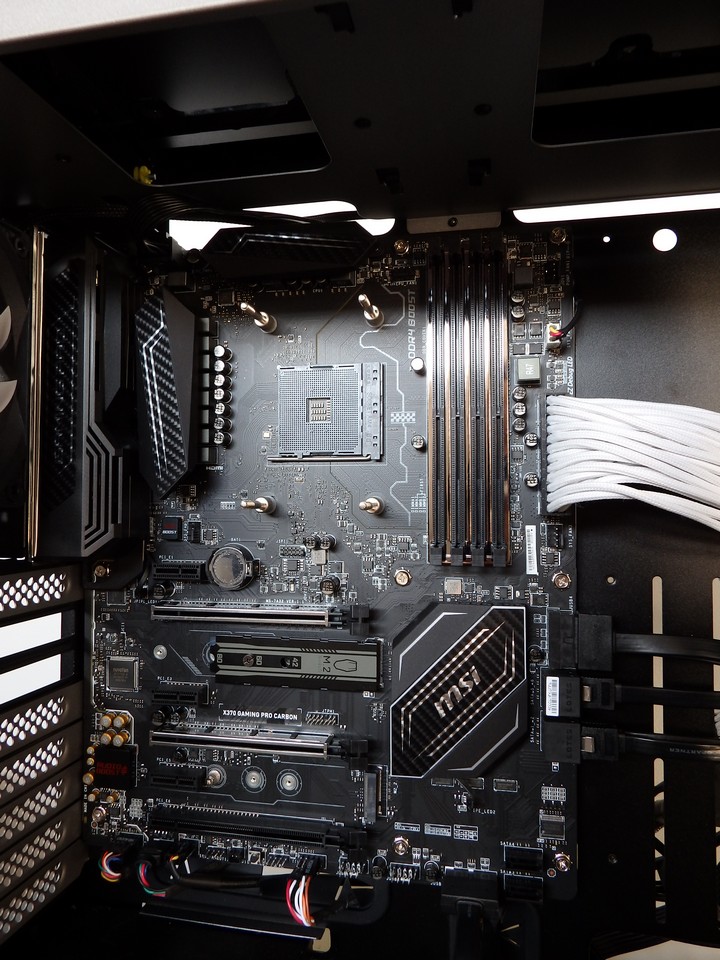
Let’s start with the aesthetics and layout of the X370 Gaming Pro Carbon. The layout is highly practical as we have come to expect from MSI. The fan and I/O headers are all in sensible places, heat sinks don’t get in the way and clearance isn’t an issue with regard to the socket or first PCI-E slot. The RAM slots are easy to access and use the twin locking levers at either end rather than a single locking lever at one end. The “carbon” aesthetic isn’t over the top and has been tastefully worked into the board design. The black PCB has a stealthy look to it which allows the subtle RGB LED lighting to be more of a highlight on the heat sink and accent around the edges without dominating the board with bling. The rear IO shield has the MSI Gaming Dragon displayed and is otherwise simple but still with a premium feel to it. LED lighting on the LAN port and USB/VR ports is a nice touch and makes for easy identification of the RJ45 network port in the dark or under a desk.


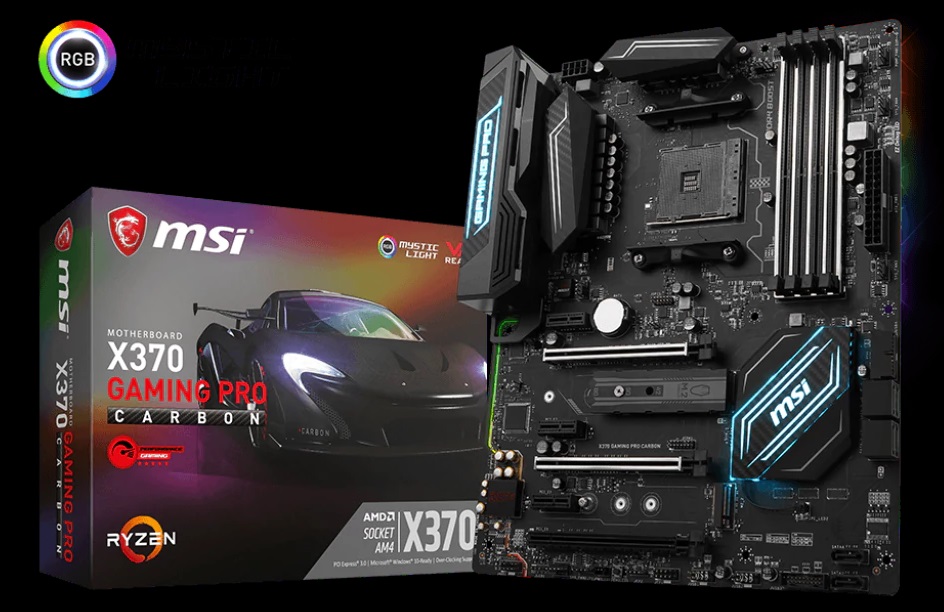
When unboxing the X370 Gaming Pro Carbon, I found it to be well packed and consistent with every other MSI motherboard I’ve seen in the last 4 years. The cardboard inner packaging is sturdy and well fitted with little room for movement. The accessories are found under the board tray with an easy to read manual, cable labels, rear IO shield and driver CD. It’s pretty standard stuff here but also important to note that no corners were cut by MSI to skimp on packaging. The outer of the box is well printed and has that premium feel that you appreciate when spending $279 on a board.
Features are what separate an enthusiast motherboard from a performance or budget motherboard – and this one has lots of them.
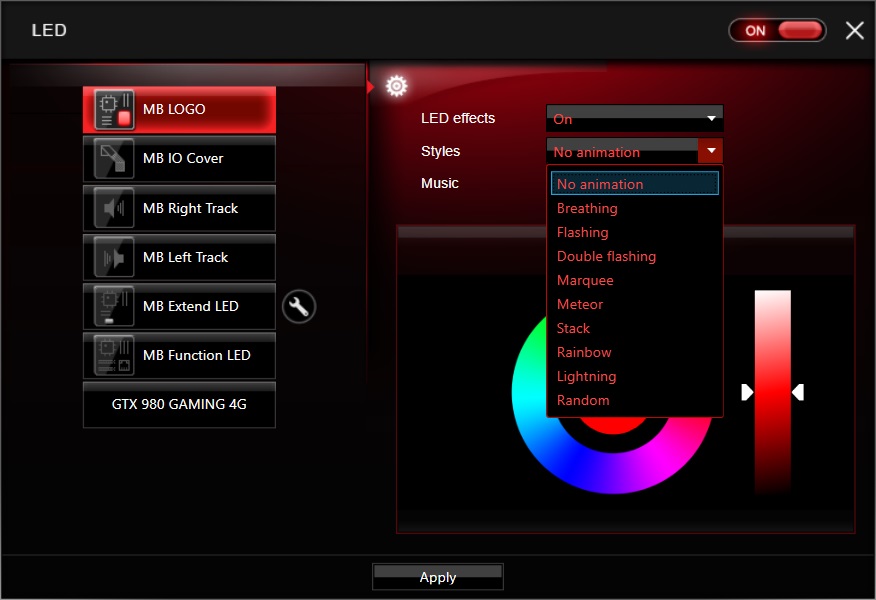
Mystic Light
The RGB LEDs are designated into zones around the board with a single header for case lighting, RAM like the GEIL that we used in our Ryzen 5 review or perhaps an RGB Wraith cooler. The software is easy to use and it makes the design colour agnostic – I should note that the only way to control the lighting is via the software as the BIOS does not interact with the RGB LEDs. There are status LEDs on the board for RAM, GPU etc. that are red but you can adjust the effect (breathing, static, flashing) or simply turn them off.
MSI has also included an RGB extension cable with splitter so that you can extend the Mystic Lighting effects easily to other devices. If you have MSI Gaming series graphics card, the Gaming App also syncs with the LED on that product as well. The Smartphone app also allows you to change the effect without needing to switch out of your game.
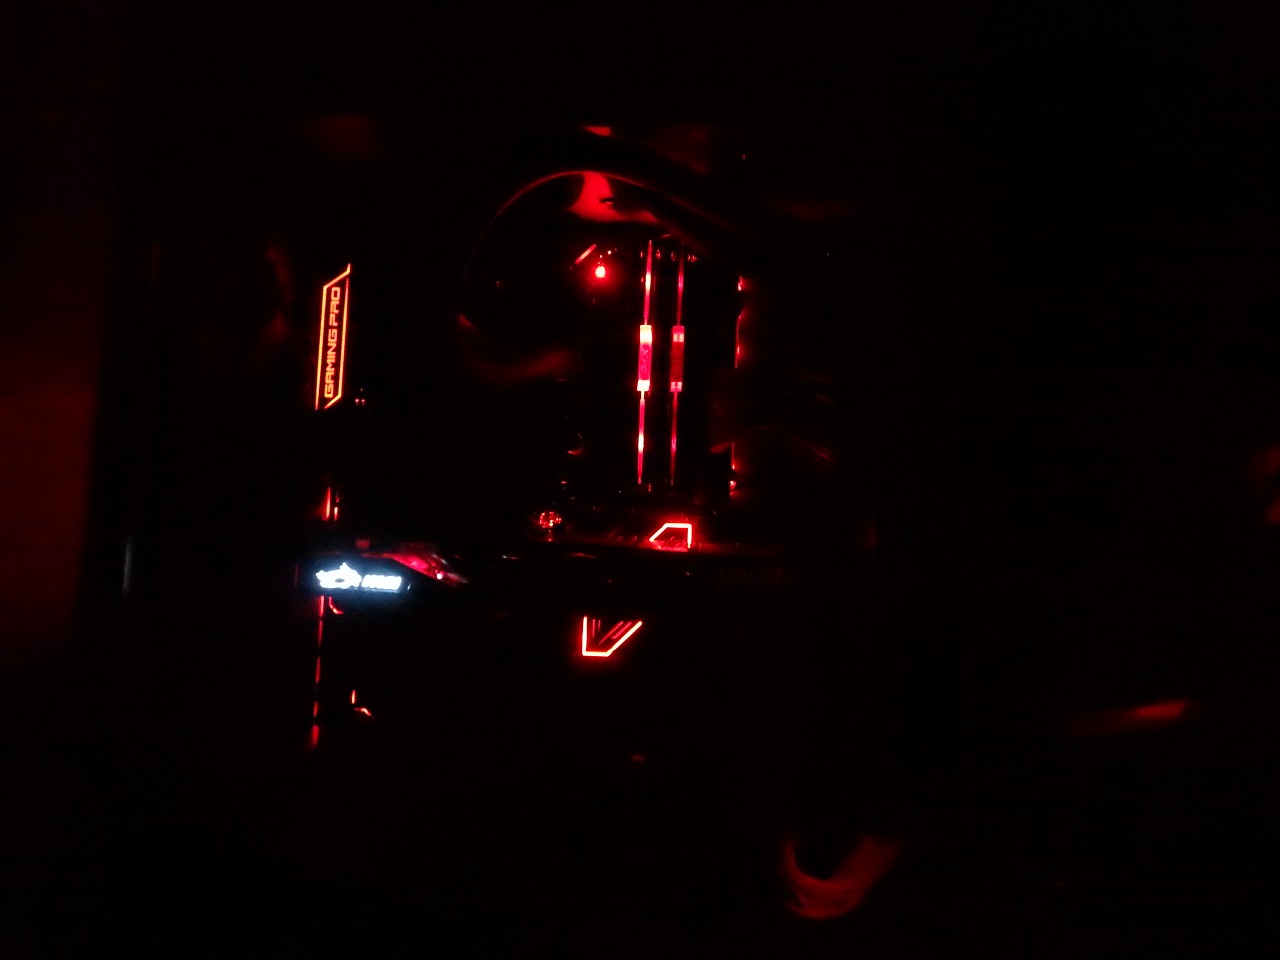
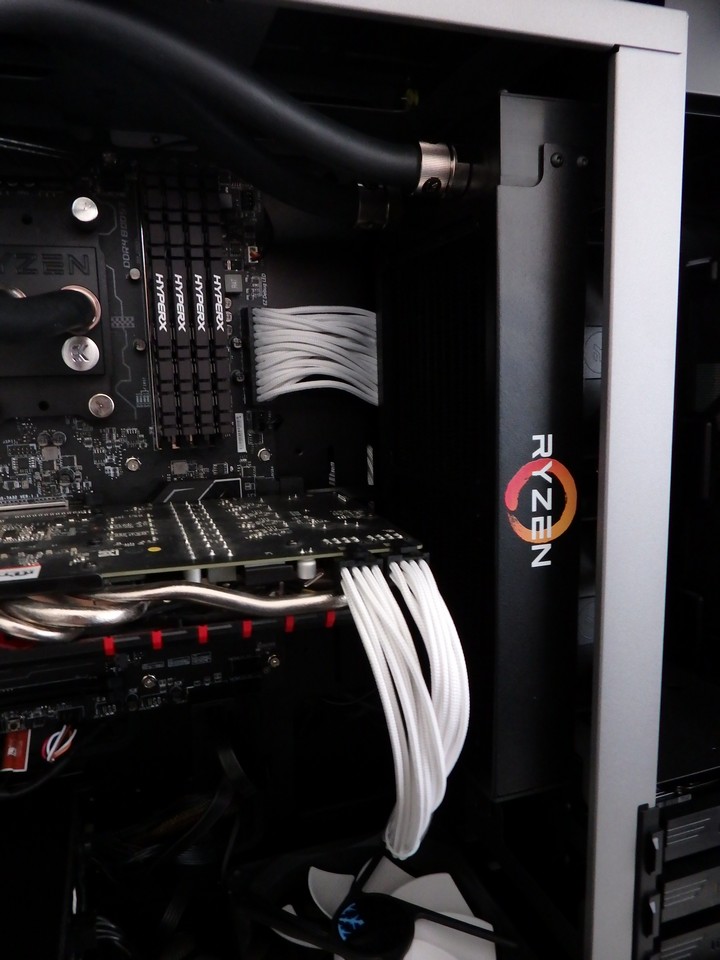
Whilst the ability to customise the colours on the fly is easy, I didn’t find myself tweaking them once I had the rig setup. Call me boring but I ended up settling on red in the final build and installing the red ADATA Dazzle kit with pulsing red LEDs on the DDR4 modules. It looked great in the In Win 509 case with smoked glass side panel.
Study Construction and EMI protection
The cool looking steel highlights are more than structural re-enforcement, MSI designers have also included Electromagnetic Interference protection to key areas of the board to make it perform better when being tweaked beyond the rated specification.
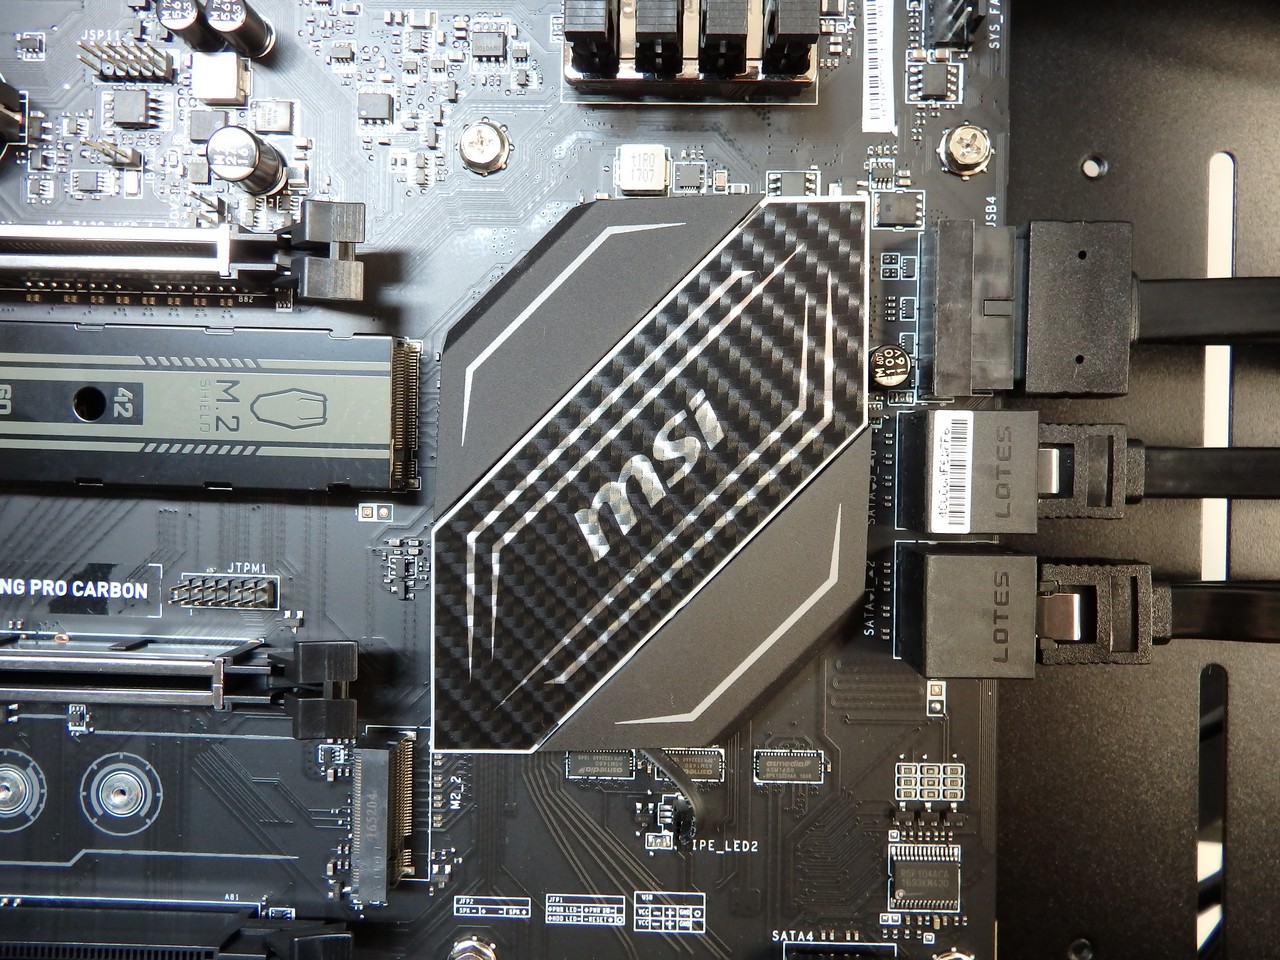
There are two M.2 slots (one slot supports 42mm-110mm M.2 drives and the other supports 42-80mm M.2 drives) with the upper one having a thermal shield that both looks cool and is designed to protect the M.2 SSD from performance issues linked to heat.
We see ‘armour-like’ protection on the M.2 slots, the PCI-E slots and the DDR4 slots. In the case of the M.2 and DDR4 slots, the protection is Electro Magnetic Interference based but there is also a level of protection from physical damage. The soldered connections are also enhanced to provide additional support – MSI claim that this design is 4x stronger than the standard soldering.
ESD protection also extends to the motherboard mounts to protect against electrostatic discharge via the chassis. The ESD protection is rated at double protection level with dual rings of grounding.


I’d have been disappointed not to see the signature Military Class 5 chokes and caps plus the other Electrostatic discharge and circuit protection measures built into the X370 Gaming Pro Carbon. MSI pride themselves on quality components and given the expected lifespan of the socket and reported future ease of upgrading AM4 CPUs, this is perhaps more relevant than on the Intel boards that have a socket change every couple of years.
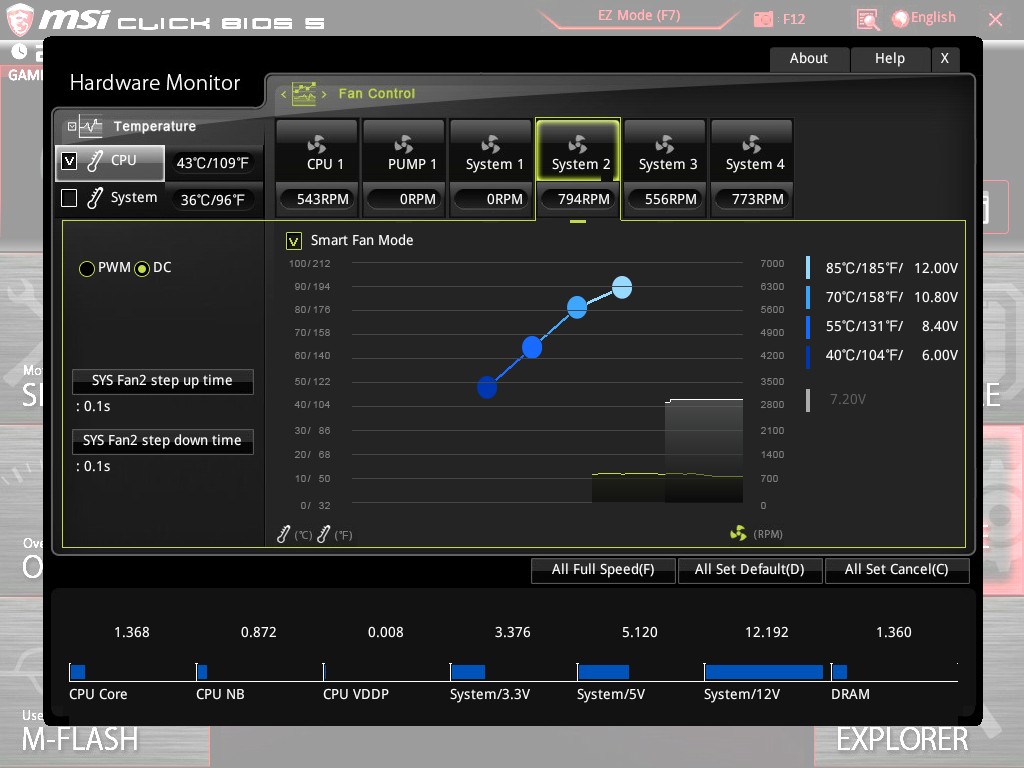
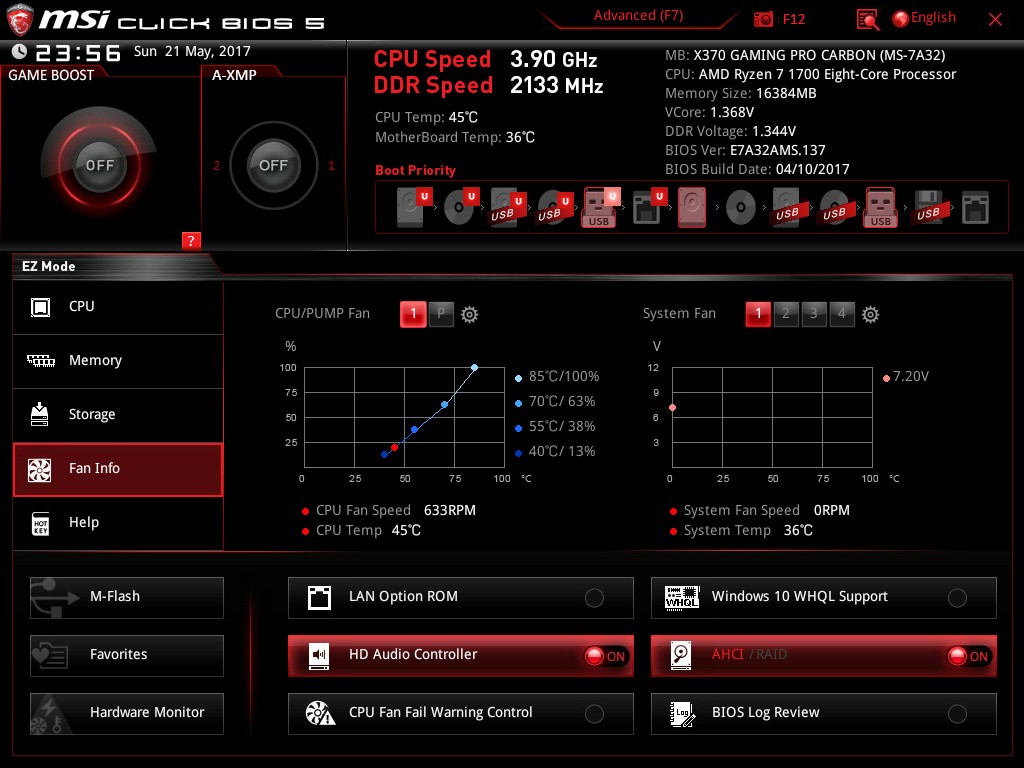
Although the In Win 509 case is massive and open, we still wanted to keep it neat and the layout of the headers on this board is neat-freak-friendly. The fan headers are both well placed and more functional than previous products. The design includes fan headers that operate in DC or PWM mode, with a dedicated Pump header (up to 2 amp).


Unlike the Z270 Gaming M7 board that we reviewed earlier this year, the lighting is slightly more restrained on the X370 Gaming Pro Carbon and in my opinion it makes for a more understated but still attractive looking setup. There are less indicator and RGB lights but enough to allow a custom look and sufficient to help debug if the thing doesn’t boot.
The power connections are in the standard locations with a 24 pin on the right side and an 8 pin CPU power connector at the top.
We don’t see any actual power, rest or OC Genie buttons on the board. I have mixed feelings on these buttons generally. On one hand, for the purposes of review in an open case, these are handy and mean that I can be lazy when connecting the front panel IO. On the other hand, once a system has been built the side panel should be on to protect it from dust and reduce any fan noise so I also don’t see why an enthusiast should be paying for features that they will probably never need. I’m more than happy to see MSI leave this feature off the X370 Gaming Pro Carbon, not worry about the switches or circuit routing and hopefully pass the savings on to the consumer with a more competitive price.
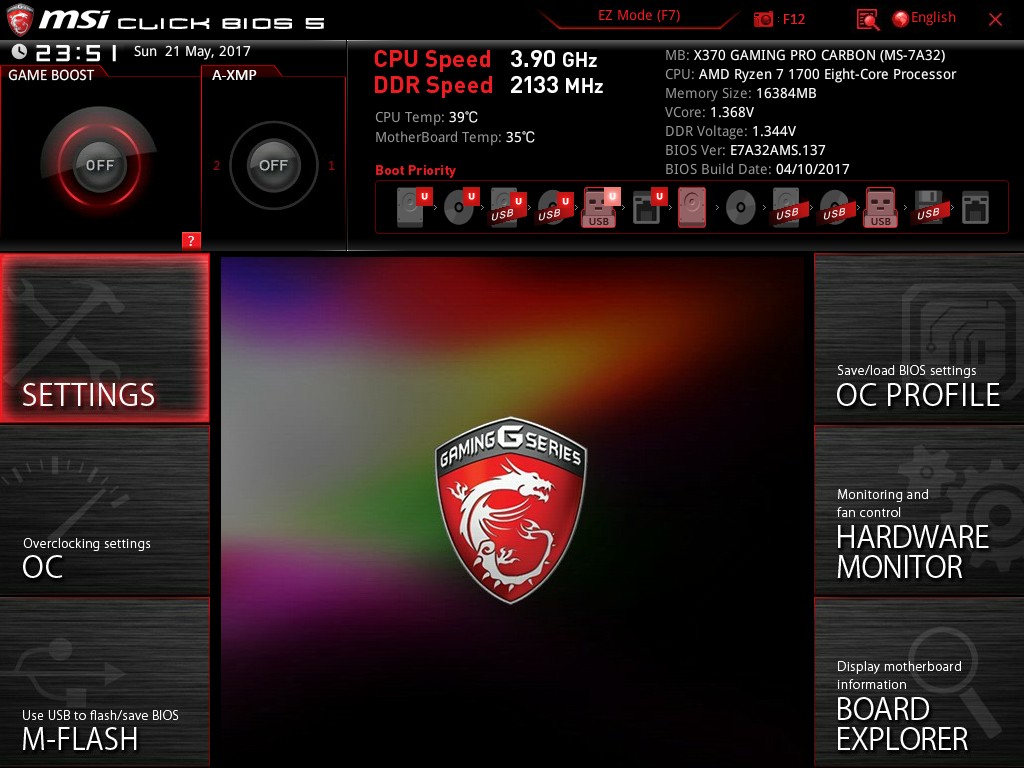
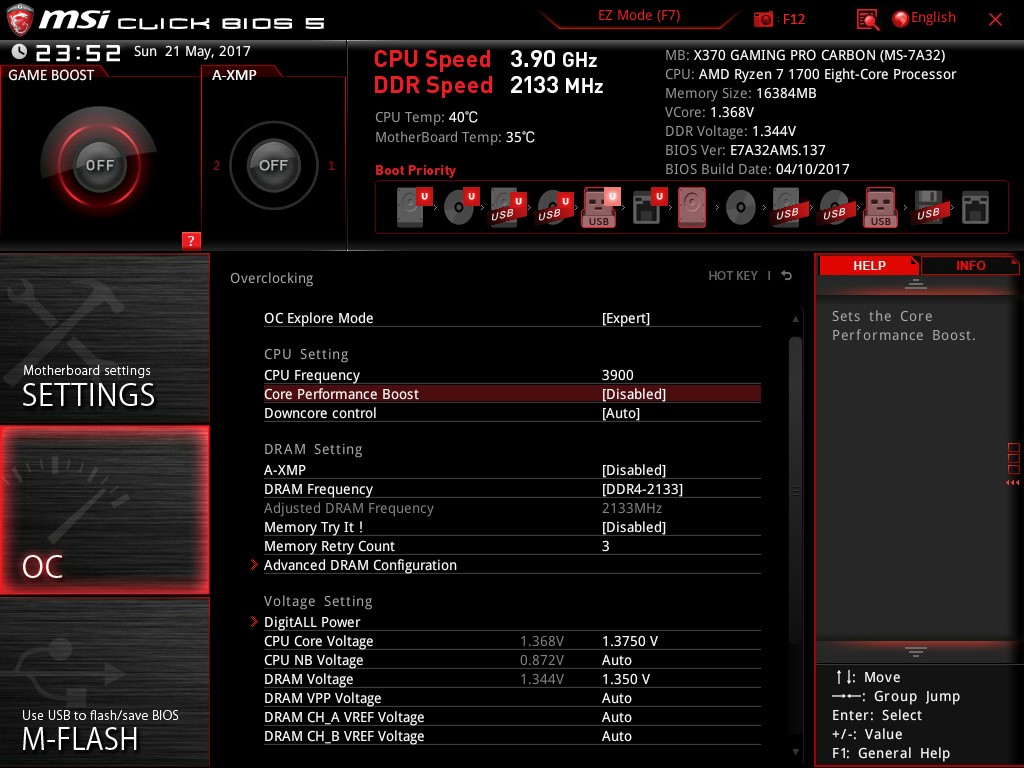
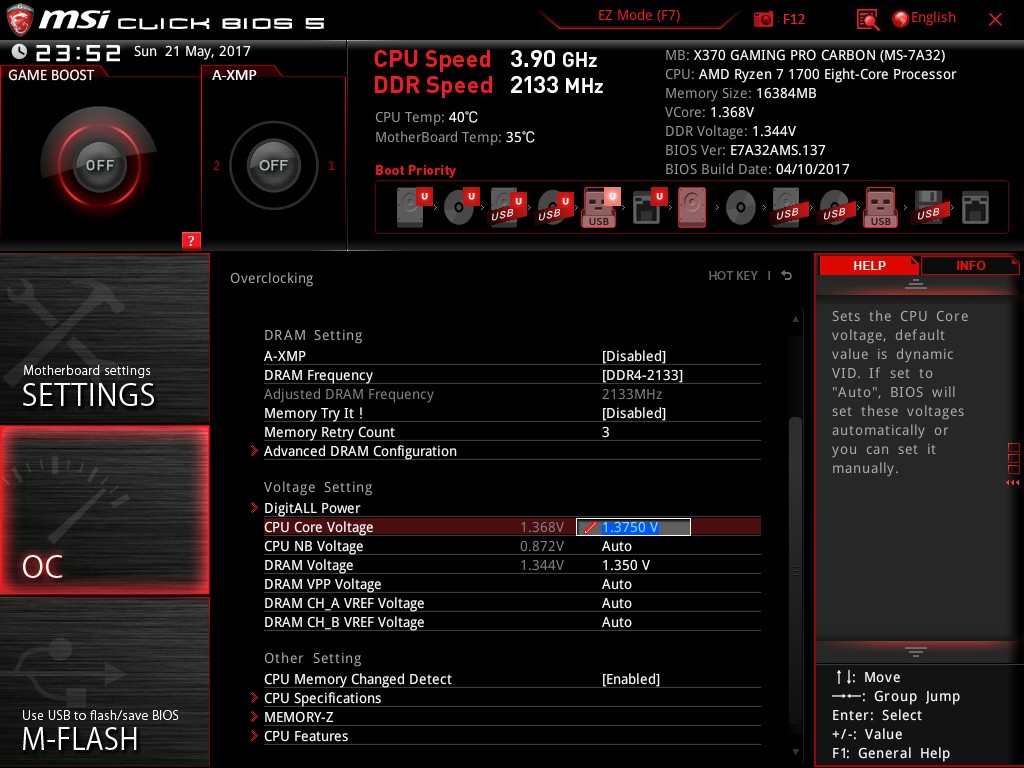
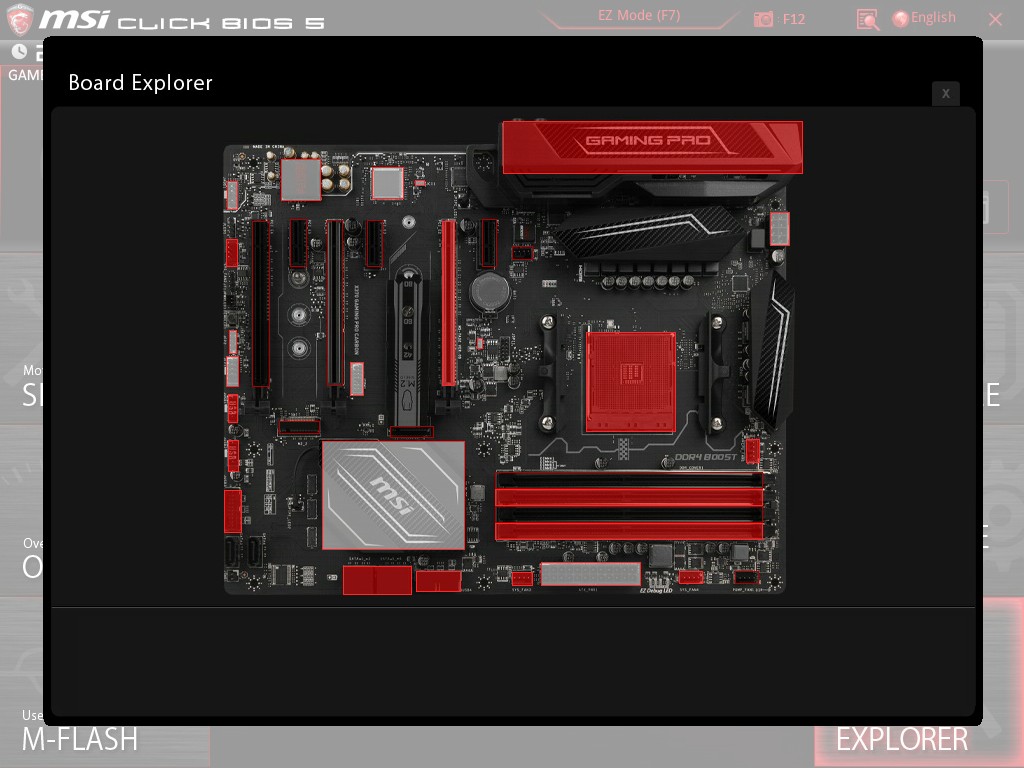
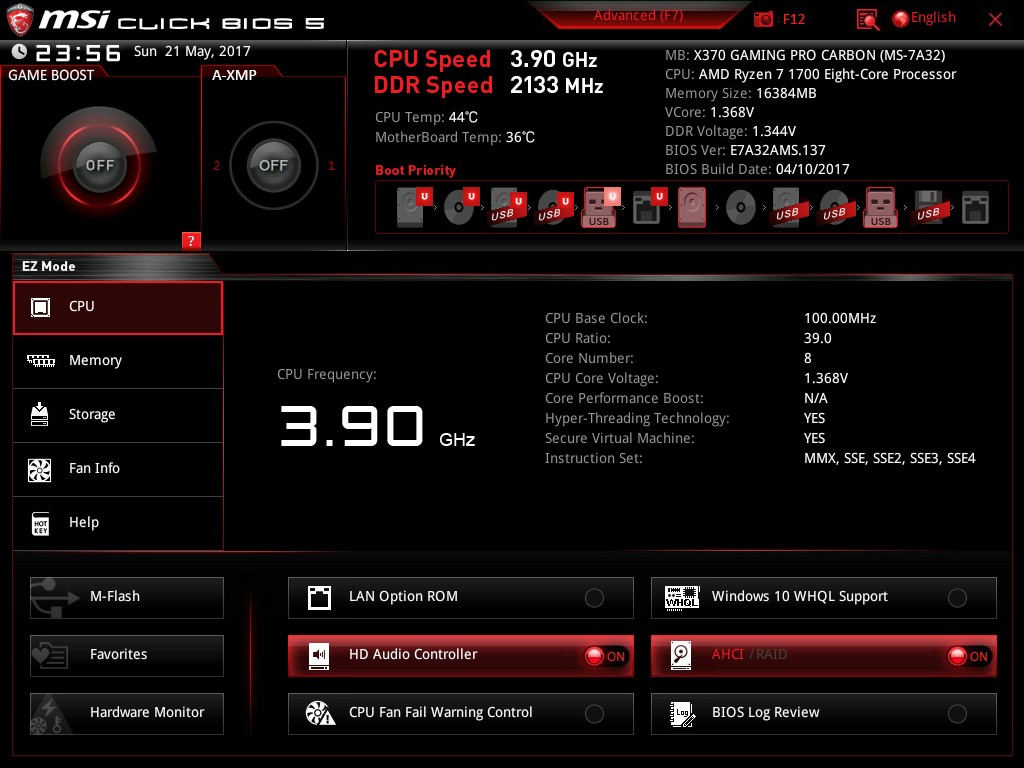
The BIOS is good but perhaps not as extensive as other BIOS offerings that I have seen. There are all the essential options available plus enough to keep most tweakers and overclockers in their happy place. RGB light control was not available in the BIOS but everything else that I looked for was there.
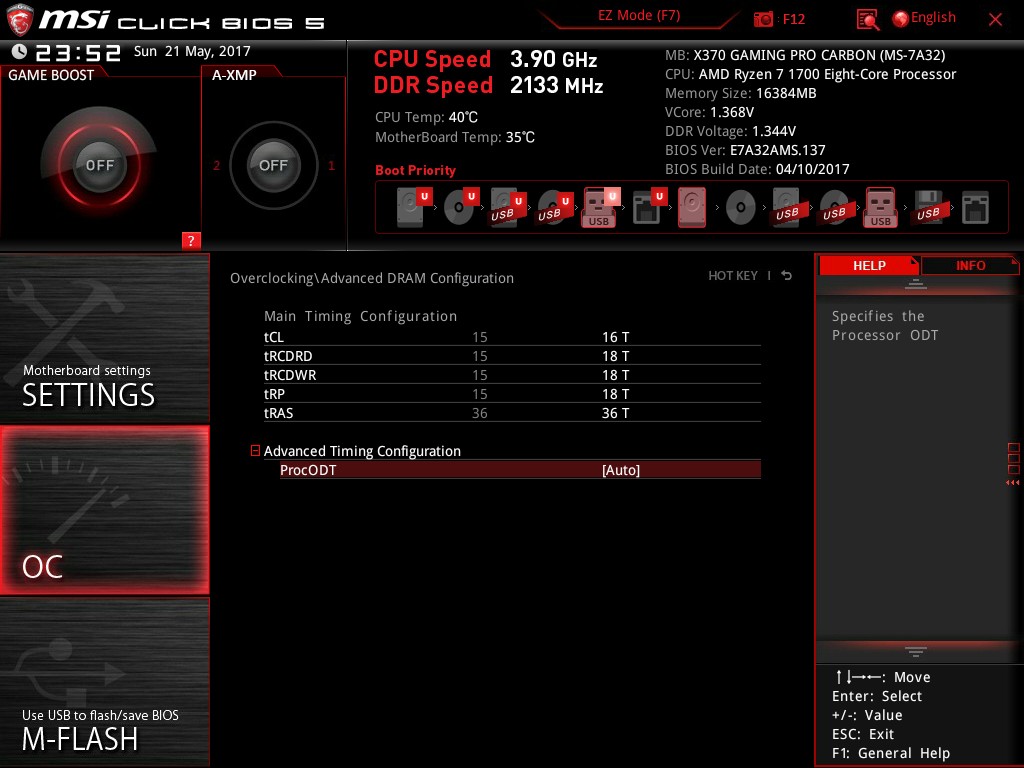
Memory Overclocking and setup did work and we were able to have the GEIL EVO X at 2933MHz with manual timings. The other memory that we had on hand had to settle for 2133 and even the Memory Try-it function on the BIOS was unable to have any joy in operating above the standard frequency. It’s worth keeping in mind that we are still in relative early days for Ryzen and the X370 chipset with more BIOS updates ahead of us to tweak memory compatibility.
The VR Boost chip filters the signal so that your VR Headset (connected to the optimised and labelled port) receives a clean and consistent signal for optimum performance. This will still of course depend on the other components that you have in your build. The rear IO shield has these ports clearly marked and even lit with a red LED to avoid confusion.


The X370 Gaming Pro Carbon uses MSI’s Audio Boost 4. The rear audio ports have gold plated connectors for ultimate signal transmission. MSI has included the Realtek ALC1220 audio processor but also implemented separate amplifiers so that you can use front and ready audio sources at the same time. It also means that the audio output supports headphones with up to 600Ω impedance.

Sound processor isolation is also implemented at a PCB level which is now considered standard for gaming or enthusiast motherboards. There is a strip that shows the audio section of the main board isolated at a PCB level. There are even different PCB layers for the left and right channels.
The Audio Boost 4 implementation has an EMI shielded ALC1220 with built in DAC delivering a 120dB Signal to Noise Ratio / 32-bit.
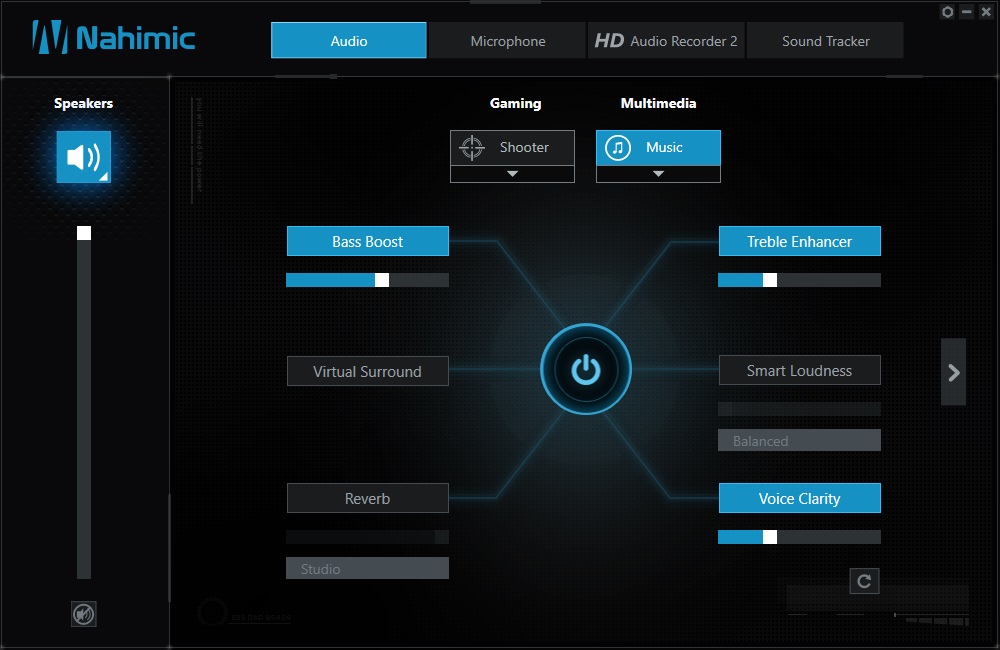

Nahimic 2 offers voice shaper and voice leveller at a mic level but when it comes to the speakers, there are 10 equaliser bands, 4 gaming pre-sets, 3 audio profiles and 6 EQ pre-sets with a single custom profile. When testing this with VOIP, the person on the other end didn’t have any issues hearing or understanding me either in a frantic game with other noise and keyboard clicking or in general Skype chat without the background noise.
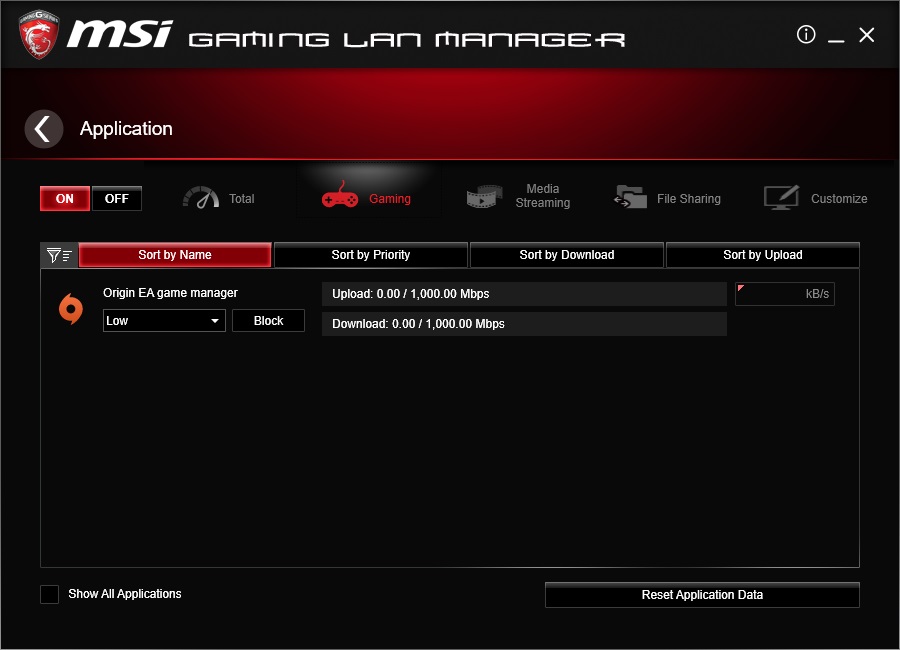
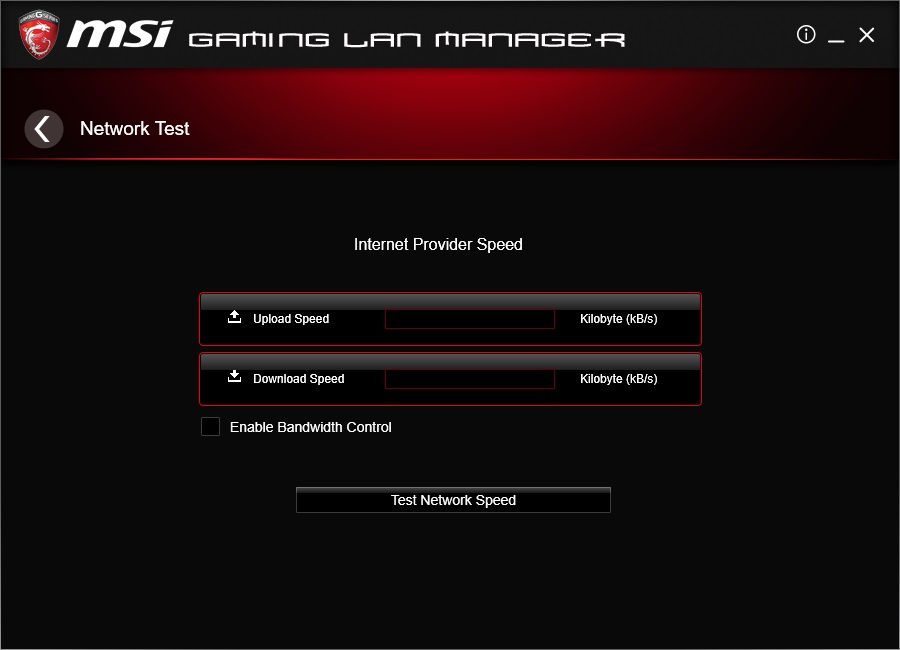
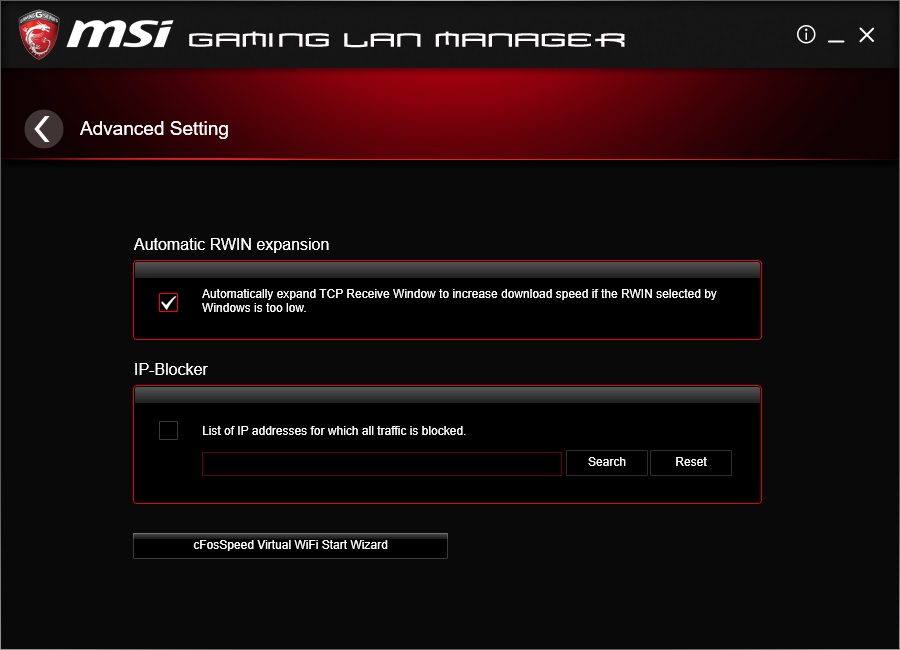
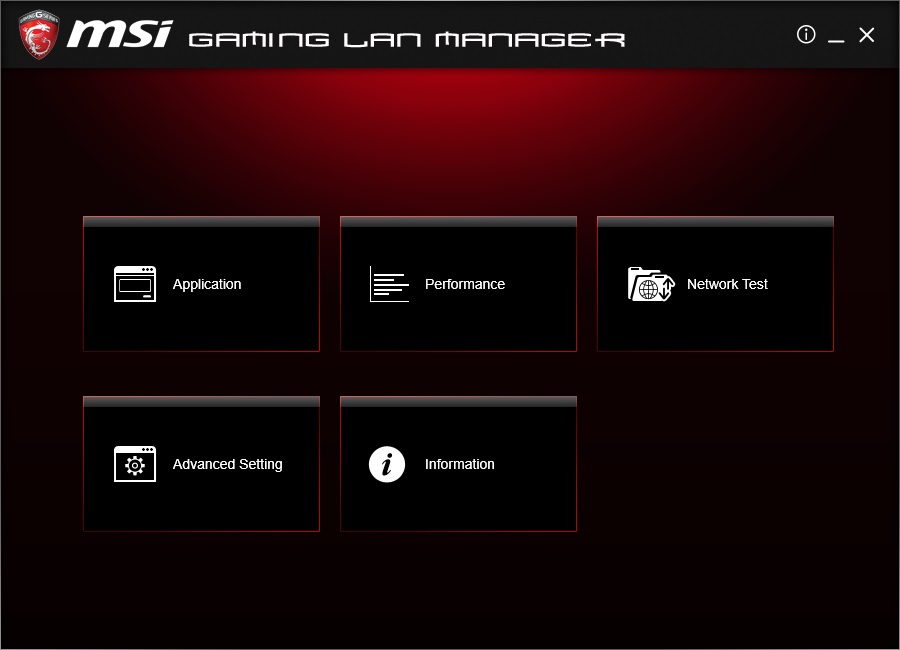
I’d expected to see Killer LAN on this board but I don’t have any complaints with the Intel Gaming LAN. The RJ45 socket is able to protect the system with up to 15KV anti-surge and ESD. The software is easy to use, handles the prioritisation as advertised and I couldn’t fault it in the end. Ping times, latency and file transfer performance were all top notch and limited by the infrastructure that I was connected to rather than the Intel Gaming LAN.
USB connectivity is as follows:

- Front Panel: 4xUSB 3.1 Gen1/Type A, 4x USB 2.0
- Rear IO: 2x USB 2.0, USB 3.1 – 1(Gen2, Type C), 1(Gen2, Type A), 4(Gen1, Type A)
This USB connectivity is enough to keep most, if not all gamers happy in at least the medium term.
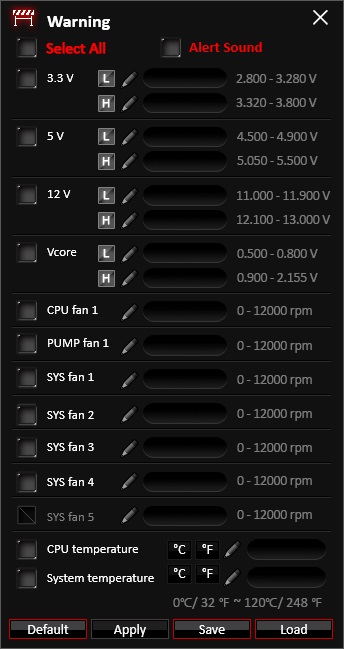
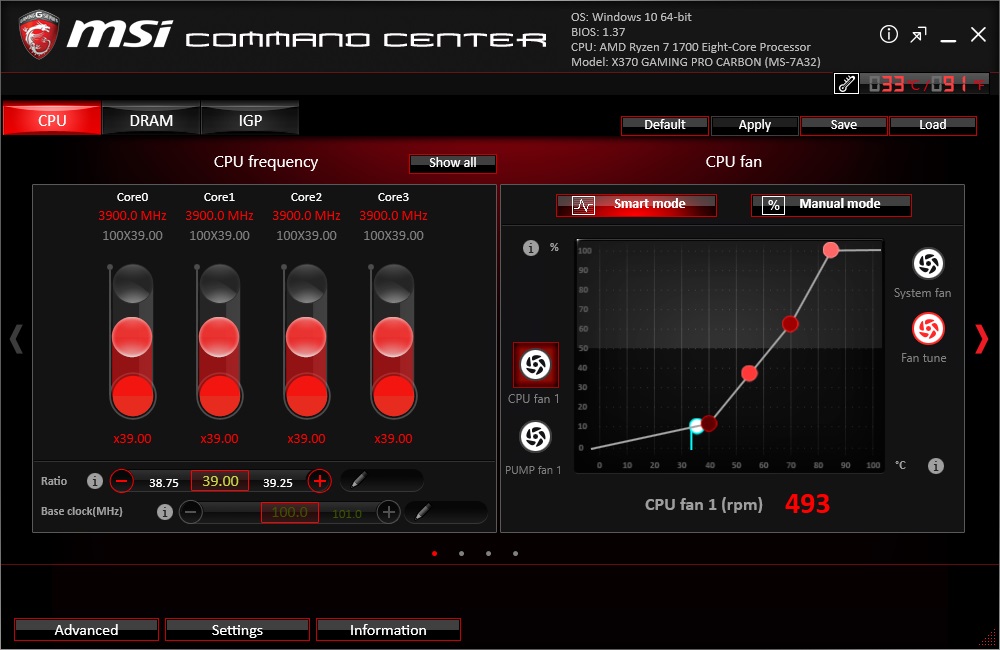
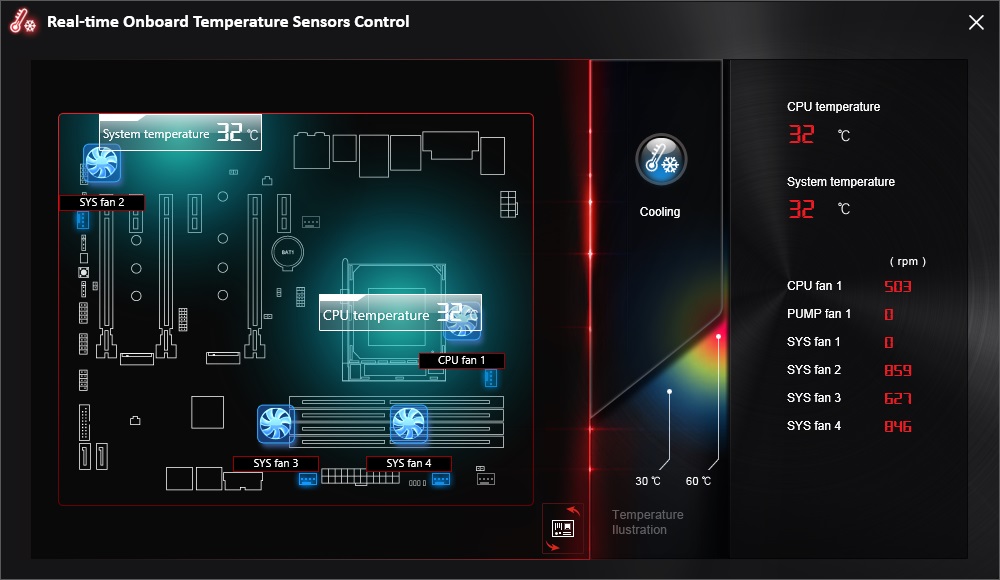
The Command Center application is familiar from previous encounters. It is robust and regularly updated.
Live update is also reliable and kept our drivers and application up to date without any fuss.


The MSI branded CPUz application is included on the installation CD along with a cool MSI branded wallpaper – whilst you don’t need them and could go with a generic CPUz / personal preference wallpaper, they do look good and match the physical appearance of the board.

The RAMDisk application is handy for cache and temporary file space to save wear and tear on your SSD and although I doubt many people will use this, it’s better to have it than need to pay ~$30 for a separate utility.

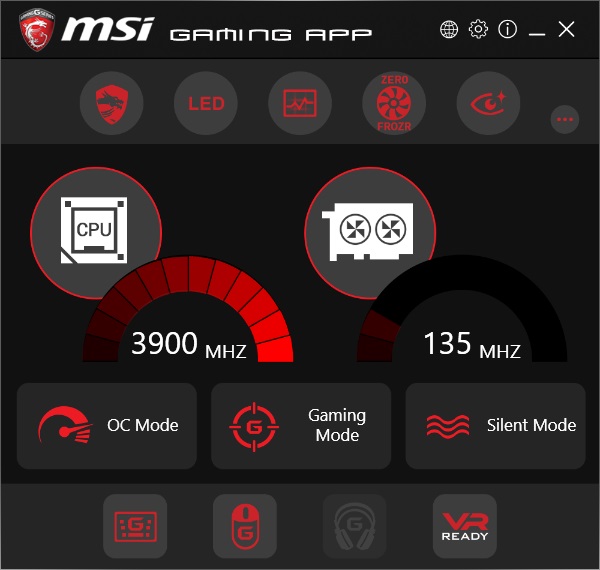
I’ve long been a fan of the MSI Gaming App so this was a welcome and familiar friend to see on the installation list.
The following applications are nice to have but will likely not be used by many gamers. That said, if you do buy this board make sure to check them out.


Dragon Eye lets you have an overlay with custom transparency and overlay functions. You can watch a stream or YouTube video while playing and even pause and adjust the volume without leaving your game. Check out the MSI site here for more details. It can be really handy when following a tutorial that is external to your game or even watching something from TV while playing and it might be enough to avoid that need for a second monitor.
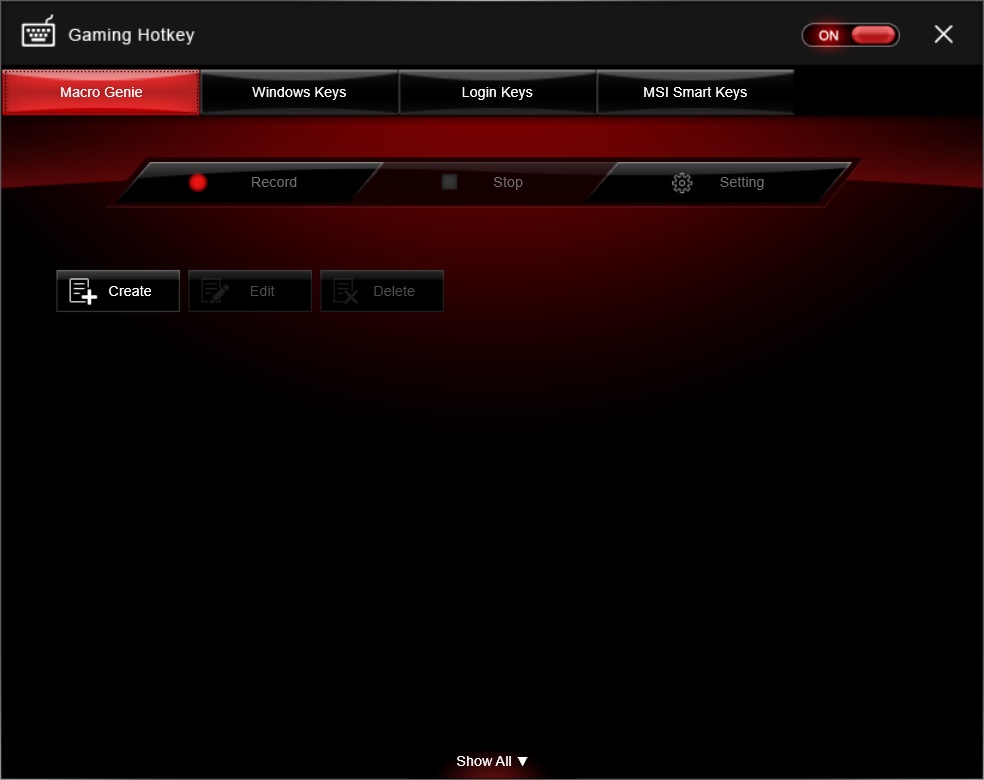
Gaming Hotkey is an easy to use program that does what it says – it maps keys to different functions but without the need for a gaming keyboard with macro keys.
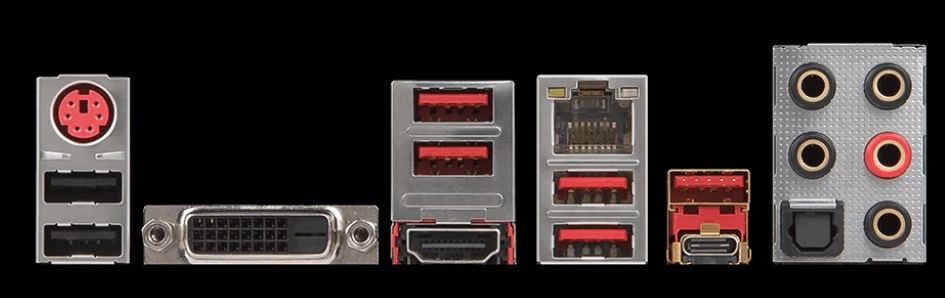
The rear I/O layout is pretty standard with the old yet still popular PS/2 connector, 2xUSB 2.0 Type-A ports, 1 HDMI, 1 DVI-D, 1 RJ45 LAN, 4 USB 3.1 Gen1 Type-A, 1 USB 3.1 Gen2 Type-A, 1 USB 3.1 Gen2 Type-C, 1 Optical and 5×3.5mm Audio ports. Interestingly there are 2 video ports that on the rear IO – although the currently released Ryzen CPUs don’t have the capability to use these future APUs will. When spending $279 on a board like this, only an extreme minority would pair it with an APU and not use a dedicated graphics card.


Technical Specifications
| CPU Support | • Supports AMD® RYZEN series Processors and 7th Gen A-series/ Athlon™ processors for Socket AM4 * This function will be supported depend on the CPU. |
| Chipset | • AMD® X370 Chipset |
| Main Memory | • 4 x DDR4 memory slots, support up to 64GB – Supports DDR4 1866/ 2133/ 2400/ 2667(OC)/ 2933(OC)/ 3200(OC)+ Mhz * • Dual channel memory architecture • Supports non-ECC UDIMM memory • Supports ECC UDIMM memory (non-ECC mode) * 7th Gen A-series/ Athlon™ processors support up to 2400 MHz only. Please refer www.msi.com for more information on compatible memory. * Please refer to www.msi.com for more information on compatible memory. |
| PCI-E | • 2 x PCIe 3.0 x16 slots (PCIE_2, PCIE_4) – RYZEN series processors support x16/x0, x8/x8 mode – 7th Gen A-series/ Athlon™ processors support x8/x0 mode • 1 x PCIe 2.0 x16 slot (PCIE_6, supports x4 mode)* • 3 x PCIe 2.0 x1 slots * PCI_E6 slot will be unavailable when installing M.2 PCIe SSD in M2_2 slot. |
| Graphics | Multi-GPU • RYZEN series processors Supports 3-Way AMD® CrossFire™ Technology Supports 2-Way NVIDIA® SLI™ Technology • 7th Gen A-series/ Athlon™ processors Supports 2-Way AMD® CrossFire™ TechnologyOnboard Graphics • 1 x DVI-D port, supports a maximum resolution of 1920×1200@60Hz* • 1 x HDMI™ 1.4 port, supports a maximum resolution of 4096×2160@24Hz* * Only support when using a 7th Gen A-series/ Athlon™ processor. * Maximum shared memory of 2048 MB |
| SATA | • AMD® X370 Chipset • 6x SATA 6Gb/s ports* • 2x M.2 slots (Key M) – M2_1 slot supports PCIe 3.0 x4 (RYZEN series processors) or PCIe 3.0 x2 (7th Gen A-series/ Athlon™ processors) and SATA 6Gb/s 2242/ 2260 /2280/ 22110 storage devices – M2_2 slot supports PCIe 2.0 x4 and SATA 6Gb/s 2242/ 2260 /2280 storage devices*** M.2 and SATA ports combination details please refer user manual. ** PCI_E6 slot will be unavailable when installing M.2 PCIe SSD in M2_2 slot. SATA3 port will be unavailable when installing the SATA SSD card in M2_2 slot.RAID • AMD® X370 Chipset • Supports RAID 0, RAID1 and RAID 10 for SATA storage devices |
| USB | • ASMedia® ASM2142 Chipset – 1 x USB 3.1 Gen2 (SuperSpeed USB 10Gbps) Type-C port on the back panel – 1 x USB 3.1 Gen2 (SuperSpeed USB 10Gbps) Type-A port on the back panel• AMD® X370 Chipset – 4 x USB 3.1 Gen1 (SuperSpeed USB) ports available through the internal USB 3.1 Gen1 connectors – 6 x USB 2.0 (High-speed USB) ports (2 Type-A ports on the back panel, 4 ports available through the internal USB 2.0 connectors) • AMD® CPU – 4 x USB 3.1 Gen1 (SuperSpeed USB) Type-A ports on the back panel |
| Audio | • Realtek® ALC1220 Codec – 7.1-Channel High Definition Audio – Supports S/PDIF output |
| Network | • 1 x Intel® I211AT Gigabit LAN controller |
| Internal I/O Connections | – 1 x 24-pin ATX main power connector – 1 x 8-pin ATX 12V power connector – 6 x SATA 6Gb/s connectors – 2 x USB 2.0 connectors (support additional 4 USB 2.0 ports) – 2 x USB 3.1 Gen1 connectors (support additional 4 USB 3.1 Gen1 ports) – 1 x 4-pin CPU fan connector – 1 x 4-pin water-pump-fan connector – 4 x 4-pin system fan connectors – 1 x TPM module connector – 1 x Front panel audio connector – 2 x System panel connectors – 1 x Chassis Intrusion connector – 1 x Clear CMOS jumper – 1 x 4-pin RGB LED strip connector |
| Rear Panel I/O Connections | – 1 x PS/2 keyboard/ mouse combo port – 2 x USB 2.0 Type-A ports – 1 x DVI-D port – 1 x HDMI™ port – 4 x USB 3.1 Gen1 Type-A ports – 1 x LAN (RJ45) port – 1 x USB 3.1 Gen2 Type-A port – 1 x USB 3.1 Gen2 Type-C port – 5 x OFC audio jacks – 1 x Optical S/PDIF OUT connector |
| Dimensions | • 12 in. x 9.6 in. (30.5 cm x 24.4 cm) • ATX Form Factor |
| Mounting Holes | 9 mounting holes |
Test Setup
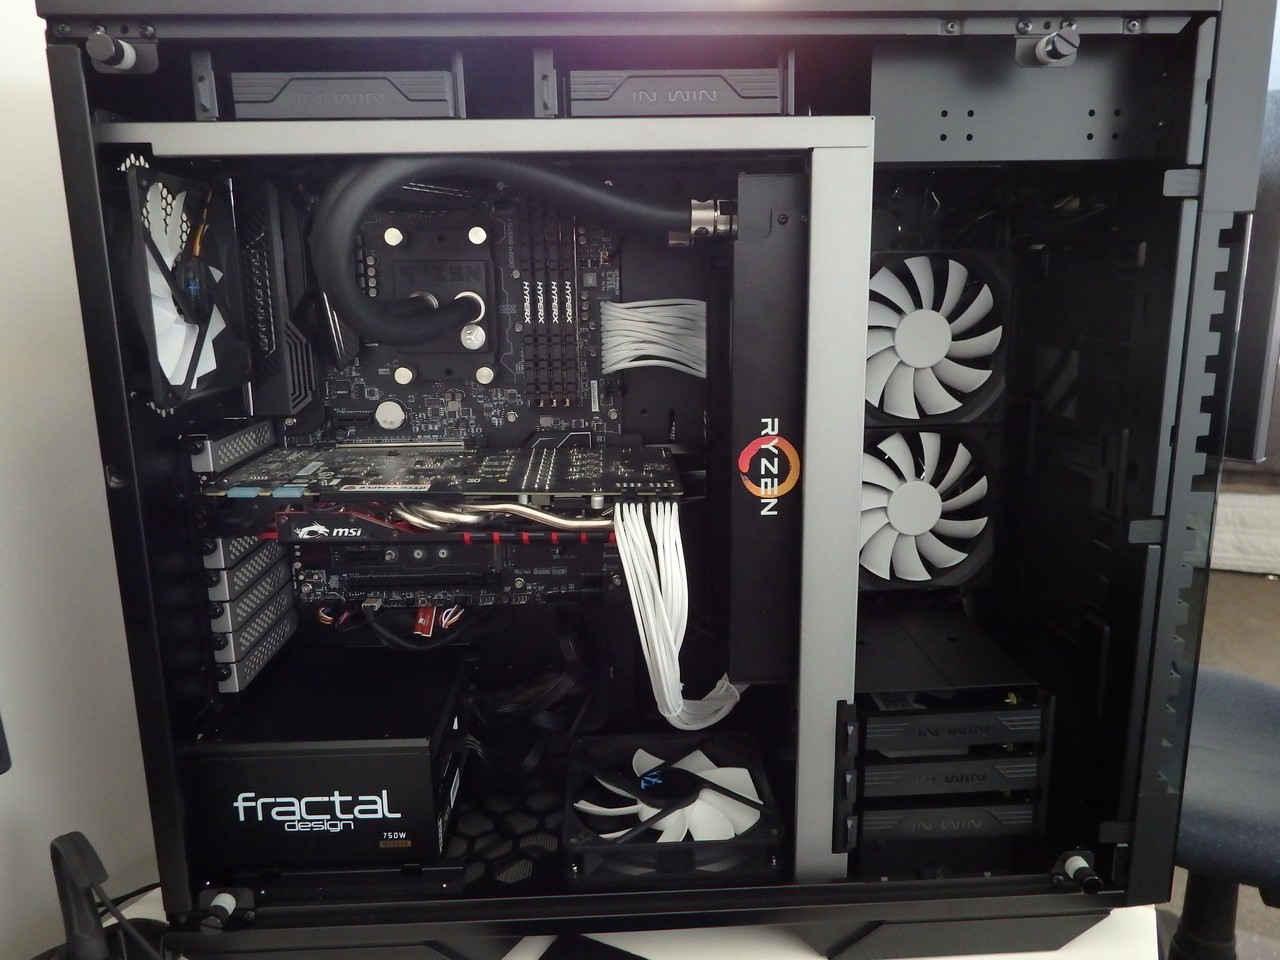
The test setup was built in our In Win 509 chassis and doubled as our practical build.
|
 |
Overclocking was on par with the other boards that we tested Ryzen 5 and Ryzen 7 with. We were able to maintain a stable and constant 3.9GHz on our Ryzen 7 1700 CPU with 1.34V and what we would consider ‘normal’ temperatures topping out in the low 60C-64C region under sustained load. The overclocking result appears to be limited by the CPU and not the board itself – given that this is our test platform going forward, we will keep working on the overclocks.
I really liked the layout of the board as both a builder and then later on once it was finished – being able to keep the final build neat is always a nice feeling.
The audio performance of this board was also solid and for the most part I used the HyperX Cloud headset but did switch to Logitech speakers as well. The sound didn’t distort at high volume and when gaming with the headset (I didn’t push it with the speakers due to neighbours and general comfort), distinct sounds of the environment or communication with other players were crystal clear. In Battlefield 1, the cavalry footsteps were clear – even directional. The explosions, vehicles, weapon reloading and general atmosphere were all done justice by the Audio Boost 4 solution. Black Ops 3 is another title where good audio can influence a gamer’s success and the X370 Gaming Pro Carbon lived up to its name – all sounds were clear with the voice chatter coming through exactly as per the volume mixer settings. Cinematic games and games with strong musical themes or dialogue were also great to play and I couldn’t find a situation where I was left wanting with the audio.
I did use headphones via both the front and rear jacks at different times but was unable to determine a difference in the audio quality – which is the result I was hoping for.
The RGB lighting isn’t as “in your face” as some other boards but it adds a configurable accent to your build. This can be setup independently for different zones and you could make your system look like a rainbow or rave if you really wanted to – the end result is up to the owner.
Whilst the layout is very practical and a dream to build with, the CLR_CMOS jumper is in an interesting spot – right in the middle of the board. It means that you have to deliberately activate the jumper and won’t do it by mistake but depending on your CPU cooler and graphics card, it could be a real pain to get to. Generally, most of us will almost never need to use it so this isn’t a deal breaker, just a little puzzling when the rest of the board layout just makes so much sense.
The socket area is relatively clear and mounting our heavy copper water block was both easy and safe from obstructions. The 6 SATA ports on the right edge of the board are likely to be enough for most people – especially when you consider the 2 onboard M.2 sockets, high speed USB 3.1 ports and growing trend of home NAS devices. Once upon a time we’d have PCs here with 4 or 5 hard drives but now we tend to only have 1-2 larger drives and our Drobo (NAS).
MSI’s software made things easier and didn’t get in the way at all. I spent a little more time with Dragon Eye during this review and saw how handy that might be for tutorials or watching TV shows when playing turn based games like XCOM 2.
Dual USB 3.1 internal headers proved to be a good match for our In Win 509 chassis and given the number of new cases emerging with dual USB 3.1 front panel ports, it’s worth investing in a board that can support them.
When we received the review sample X370 Gaming Pro Carbon, there was a BIOS update. Generally speaking, I hate updating a motherboard’s BIOS and I do mean hate. In this case, MSI has made it very easy with prompts and a process that you are in effect forced to follow. The process worked, was quick and a far cry from the experience that many of us slightly older PC gamers grew up on 10-15+ years ago.
For this review, I didn’t use the X99 Intel system at all – I made the complete switch to this PC with the view that if there were stability issues when working with photos, transcoding, doing website work, gaming or watching content, I’d be sure to see them. This system has been 100% rock solid, applications have not faultered, games have been played without glitching and updates have been applied without incident at both a Windows level and MSI software level. Zero complaints from myself and everyone else that used the system. I’d be more than happy to call this test system my own and would be feeling happy with my purchase if I’d bought the X370 Gaming Pro Carbon with my own cash.

Pricing
At the time of writing, the MSI X370 Gaming Pro Carbon has a street price of $279. It isn’t cheap and it’s less affordable than other AM4 gaming boards but it has the essential features, several luxuries and provides a long term practical AM4 platform. The price is very reasonable for the features and build quality MSI have delivered.
For those on a budget, the B350 series are the best place to look but we were looking for something a bit more special as our go-forward Ryzen testing platform and the X370 Gaming Pro Carbon seemed to fit the bill on paper and then backed it up when tested in real-world conditions.
Conclusion
This is a solid performer at a price point for enthusiast gamers. The X370 Gaming Pro Carbon has a pleasing aesthetic that will work with any system and a layout that makes building easy. It’s built to last and has all of the bells and whistles that a PC Gamer needs. MSI has hit the mark with VR Boost, a great implementation of the ALC 1220 audio processor under Audio Boost 4 and intuitive software. As a gamer, this board has everything I need but as an enthusiast it also has a lot of features that I’d want or would practically use. It’s hard to go wrong with the X370 Gaming Pro Carbon.
| MSI X370 Gaming Pro Carbon Motherboard | |
 |
|
|
PROS |
|
|
CONS |
none |
 |
|


