
If you’re considering a Z390 platform for your next build then chances are that you have already accepted the fact that it won’t be cheap and made the decision to chase the highest clock speed. Let’s have a look at one of the most ‘premium’ Z390 motherboards available – the ASUS Maximus XI Gene. The Gene is the MATX version of the ROG Maximus range and is available again after being omitted from the line-up for a while. All I can say is welcome back mate you’ve been missed
Given the cost of performance CPUs like the Intel i9-9900K, it makes sense that 9th Gen Intel system builders will want to get the most out of the experience and many who buy this platform will be going for top performance that lasts for quite a while. This is where the ASUS ROG Maximus XI Gene comes in for the MATX form factor rigs.

The ASUS Maximus boards have always been the top-shelf option for enthusiasts and extreme gamers. These boards have always been excessive in terms of features, performance, aesthetic design and they’re always hefty in terms of price as well.
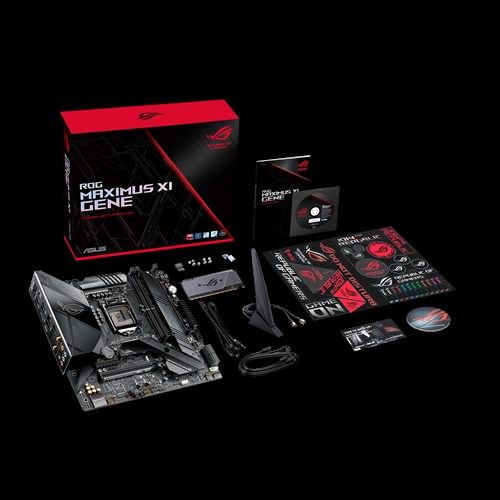
So, what are we getting excited about here? The ASUS Maximus XI Gene is a Micro ATX (mATX) enthusiast motherboard built around the Intel Z390 chipset with four M.2, four SATA 6Gbps, support for DDR4 4800MHz and double capacity DIMM modules. It also has gigabit LAN, 802.11ac Wi-Fi, ASUS’s ROG DIMM.2 dual M.2 expansion card, USB 3.1 Gen 2 and Aura Sync RGB lighting controls. The design and software take what is an impressive list of features to the next level so strap in and let’s take a closer look.
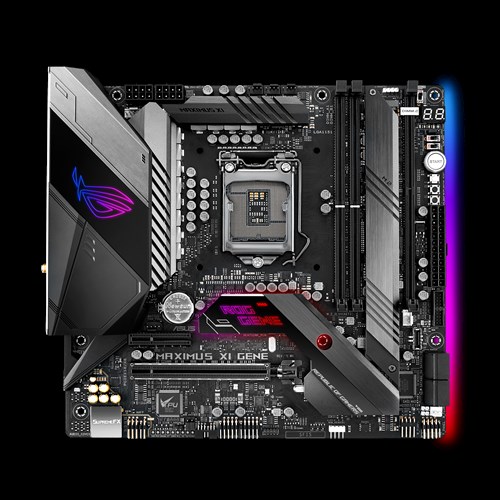
Aesthetically, this is a good looking board and relatively design agnostic in terms of colour scheme. The black base design, glossy black RGB areas and gunmetal grey heatsinks will work with any colour lighting/cabling that a system builder could want to use.


Who is it for?
If there was ever a motherboard with an identity crisis it’s this one. Someone needs to remind the Maximus XI Gene that it’s a Micro ATX board because when it comes to features the Gene leaves most full-sized ATX Z390 motherboards in its dust. The Maximus XI Gene is essentially for enthusiasts or enthusiast gamers wanting a top-shelf gaming platform in a Micro ATX form factor where a full ATX board won’t fit.
This board is also suitable for enthusiast overclockers wanting a more compact platform or something a little special in the mATX form factor.
As someone who tends to have a long term personal build (5+ years) in the house that is rarely tinkered with, this board also appeals to me as the basis for a rig that I’ll invest heavily in at the start and then just use it as long as I can before I ‘need’ another full upgrade. My current long-term build from 2013 is an ASUS P8Z77-V Deluxe with 16GB DDR3 and an i7-3770K running a GTX 970 having upgraded from the original GTX 670. It’s still doing the job but is now showing its age.
Layout
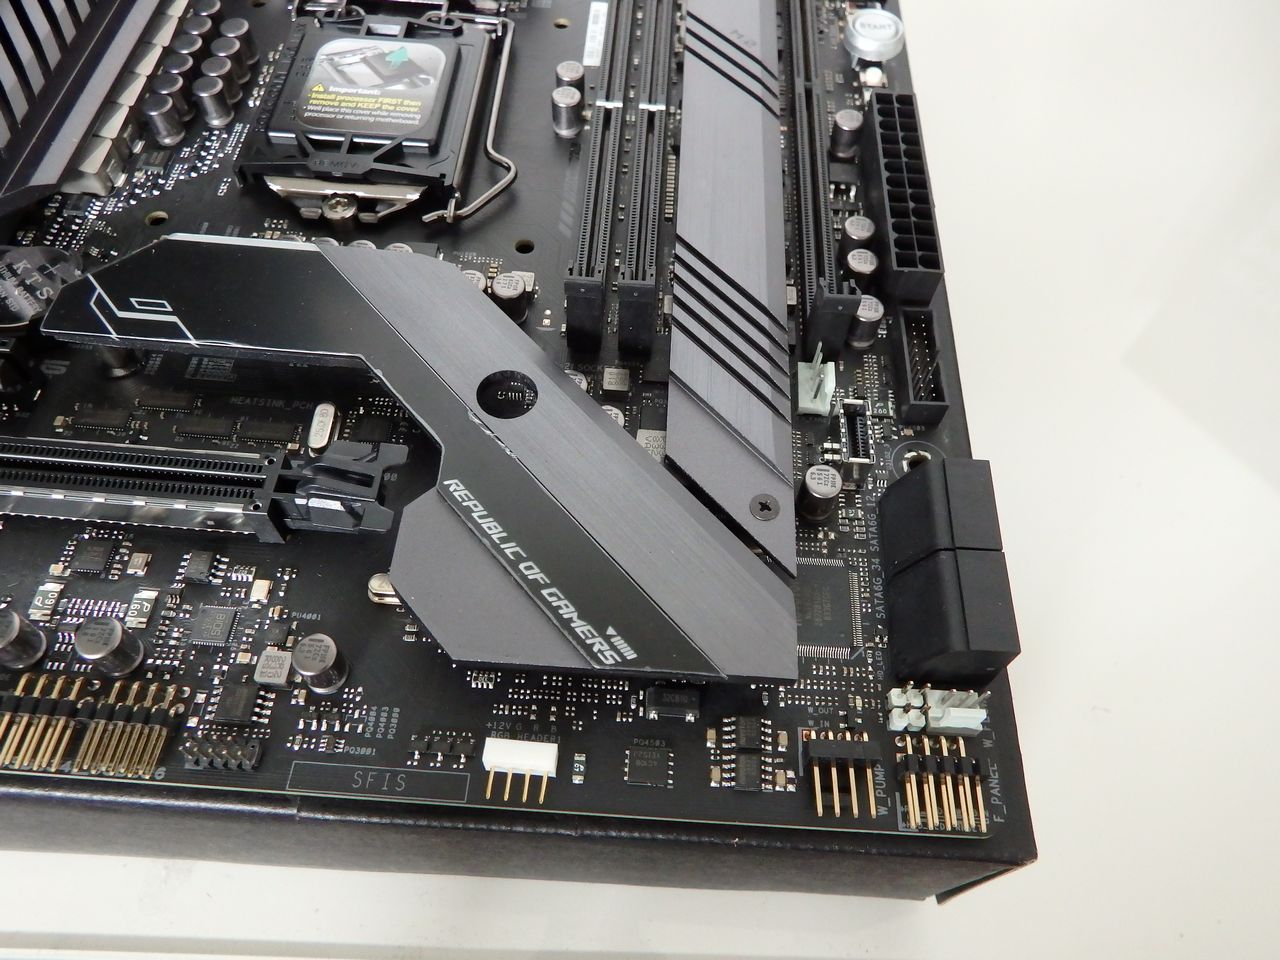
The layout design is clearly aimed at enthusiasts and builders who want the most features possible on an mATX sized board, and whilst it is a busy motherboard, it doesn’t feel cramped or overcrowded. When setting up the test bench the initial observation that came to mind was ‘organised’ in that the Maximus XI Gene has everything squared away in a logical place that just works.

I first saw the vertical DIMM-style implementation of M.2 SSDs on the X399 Zenith Extreme motherboard during our Threadripper 2950X review and it makes a lot of sense, keeping the relatively sensitive M.2 drives well out of the hot zones and in the cooling corridor of cross board airflow.
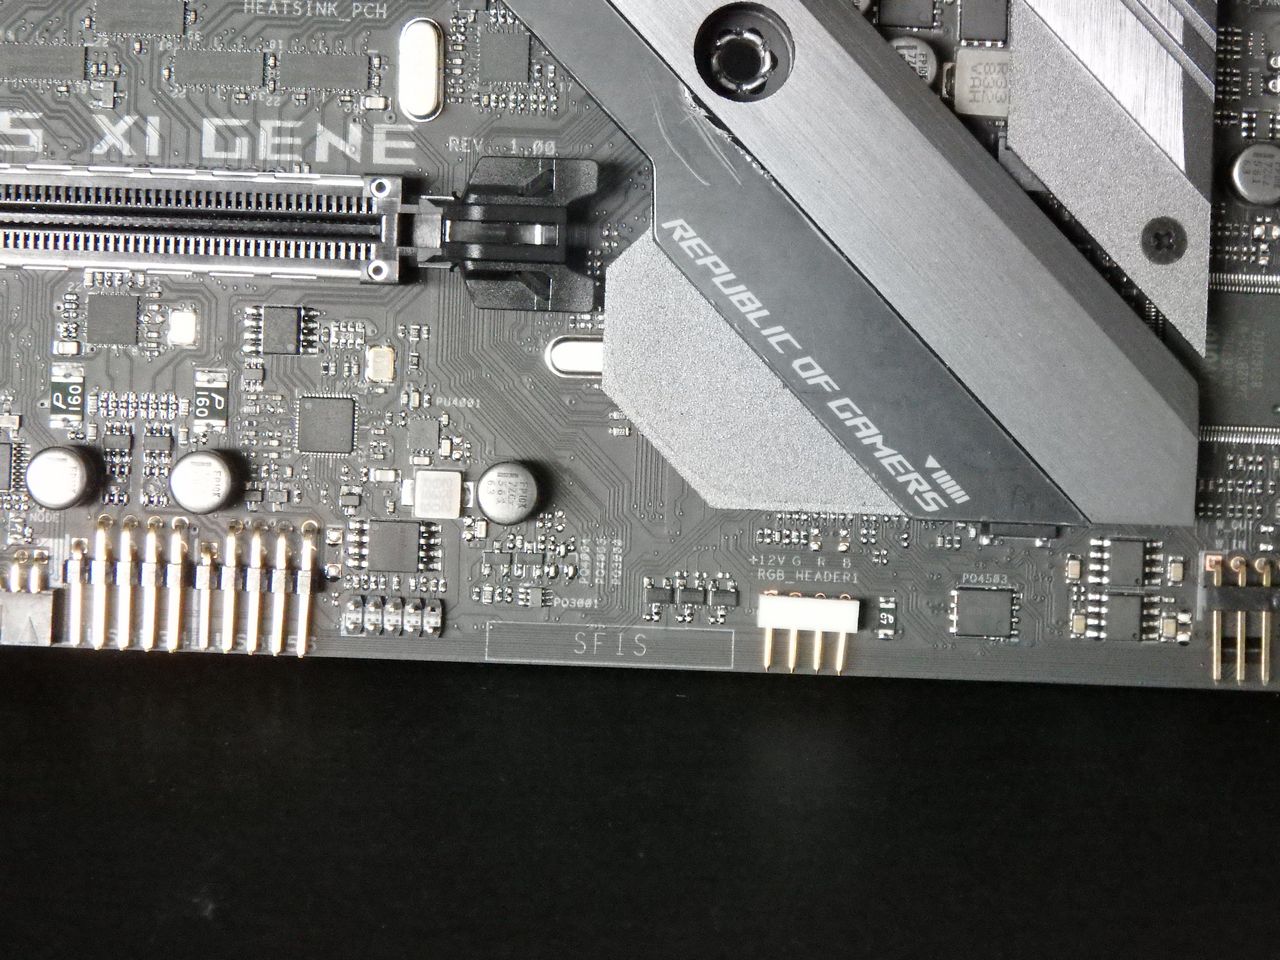
The lower edge of the motherboard has all headers angled at 90 degrees away from the motherboard allowing for a very neat finish. If you take your time, you could probably route cables under the edge of your motherboard at the time of installation (before you seat the board) for an almost invisible finish.
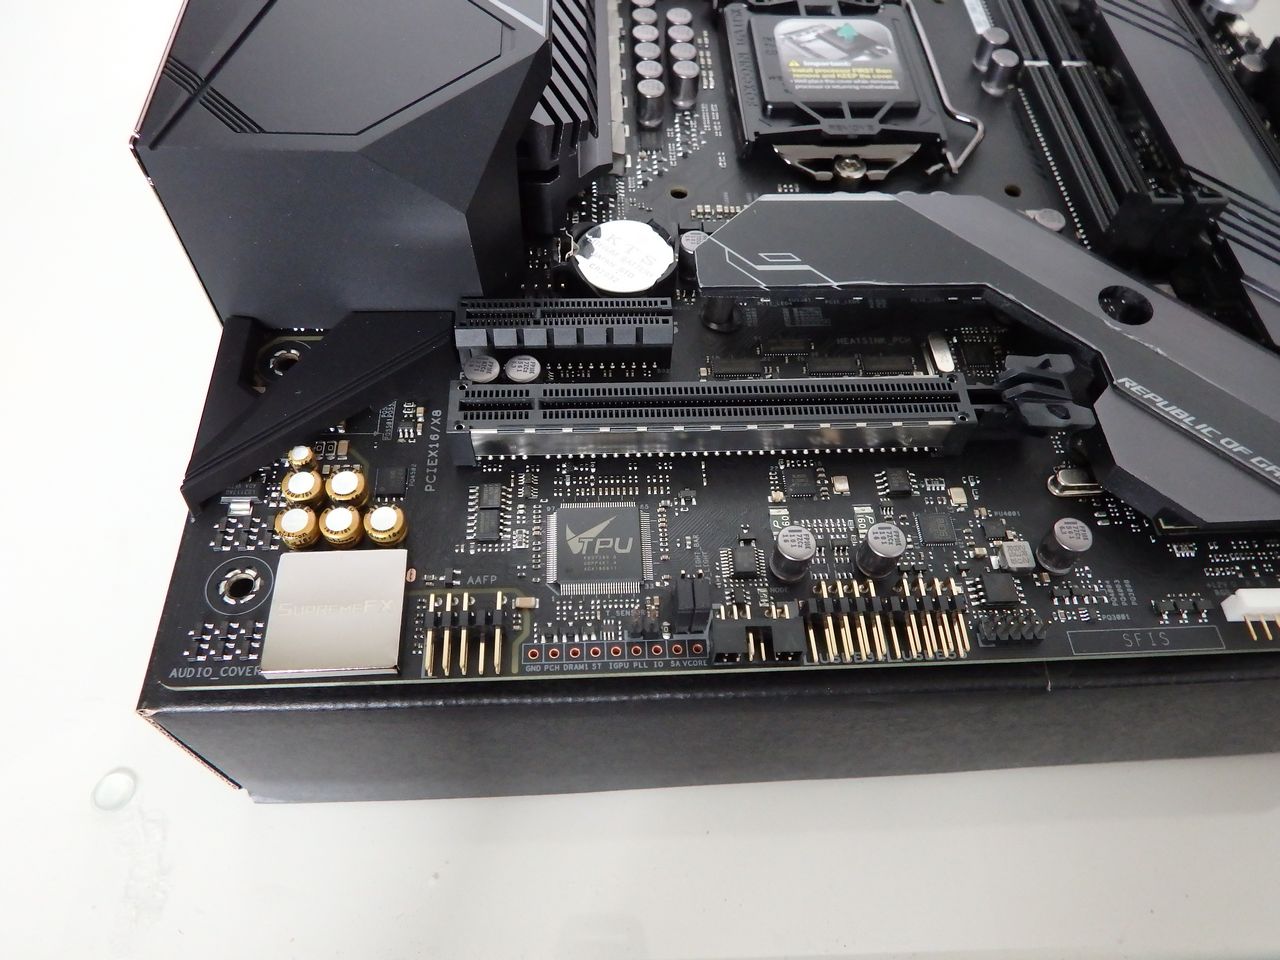
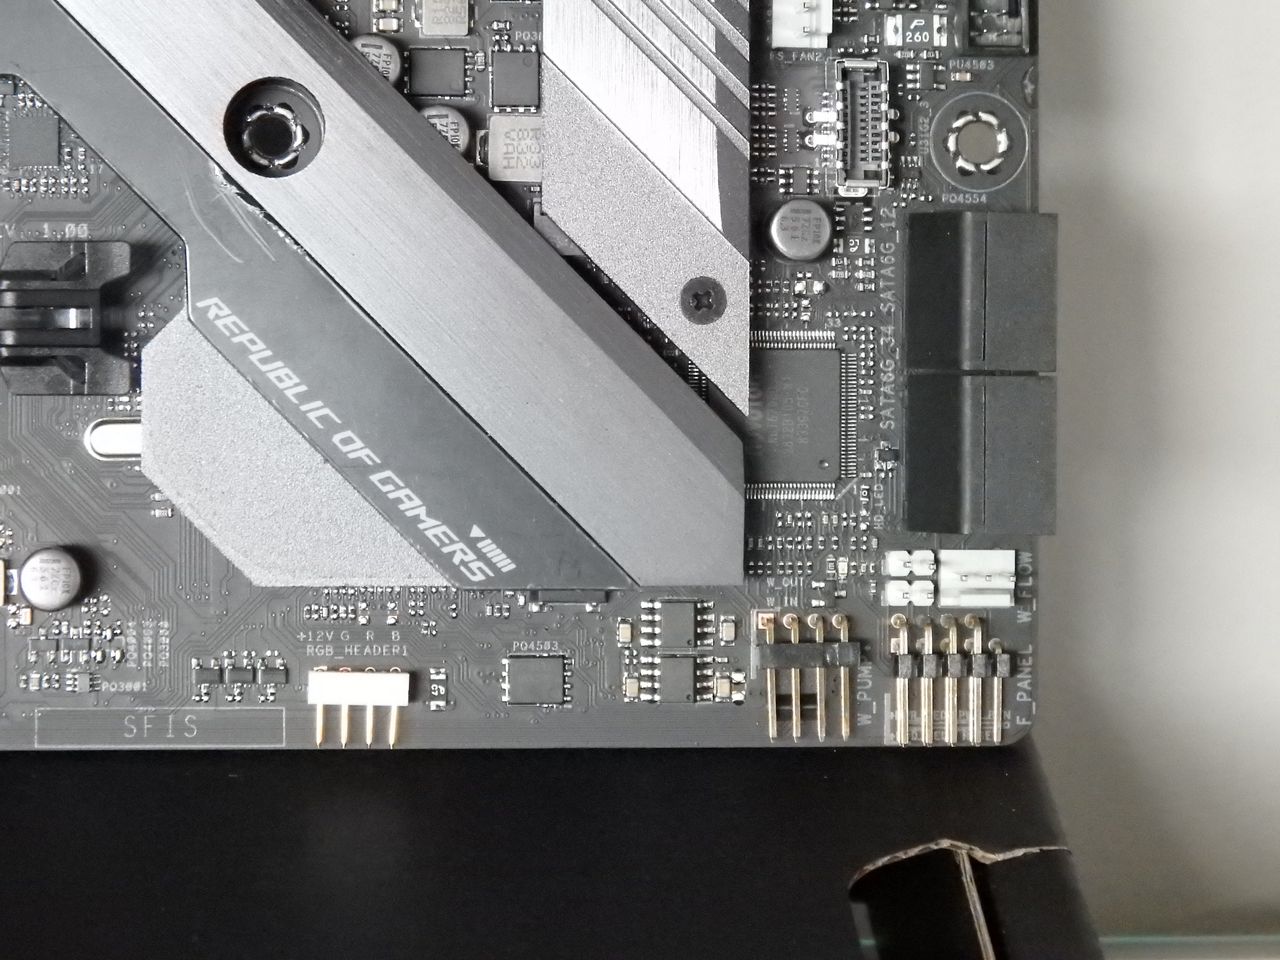
With 4x M.2 slots on the board, it wasn’t a surprise to see 4 instead of 6 SATA ports on the right edge of the motherboard. It’s worth noting that the M.2 slots are not M.2 SATA but PCIE 3.0 x4. Given the size of hard drives now and the lack of accommodation for more than 2-3 3.5″ drives in most MATX cases, 4 SATA ports should be ample for most users.

The heat sinks for VRM didn’t crowd the socket and I didn’t have any issues fitting the AIO pump to the Maximus XI Gene.

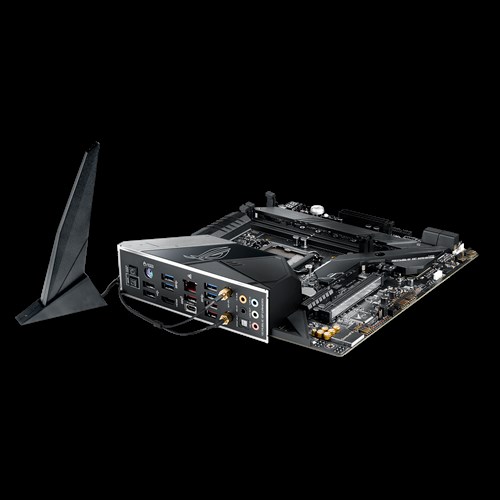
Fan headers, thermal probes, USB headers and mounting screw locations were all easily accessible. The integrated rear I/O shield works well as part of the I/O shroud.

The rear I/O plate is pre-mounted and includes:
- Clr CMOS button
- PS/2 keyboard/mouse combo port
- HDMI 1.4b
- Gigabit LAN with LANGuard ESD protection
- 3xUSB 3.1 Gen 2 Type-A
- 1xUSB 3.1 Gen 2 Type-C
- 4xUSB 3.1 Gen 1
- 2xUSB 2.0
- 2xWIFI Antenna
- Optimal out + 8-channel Audio
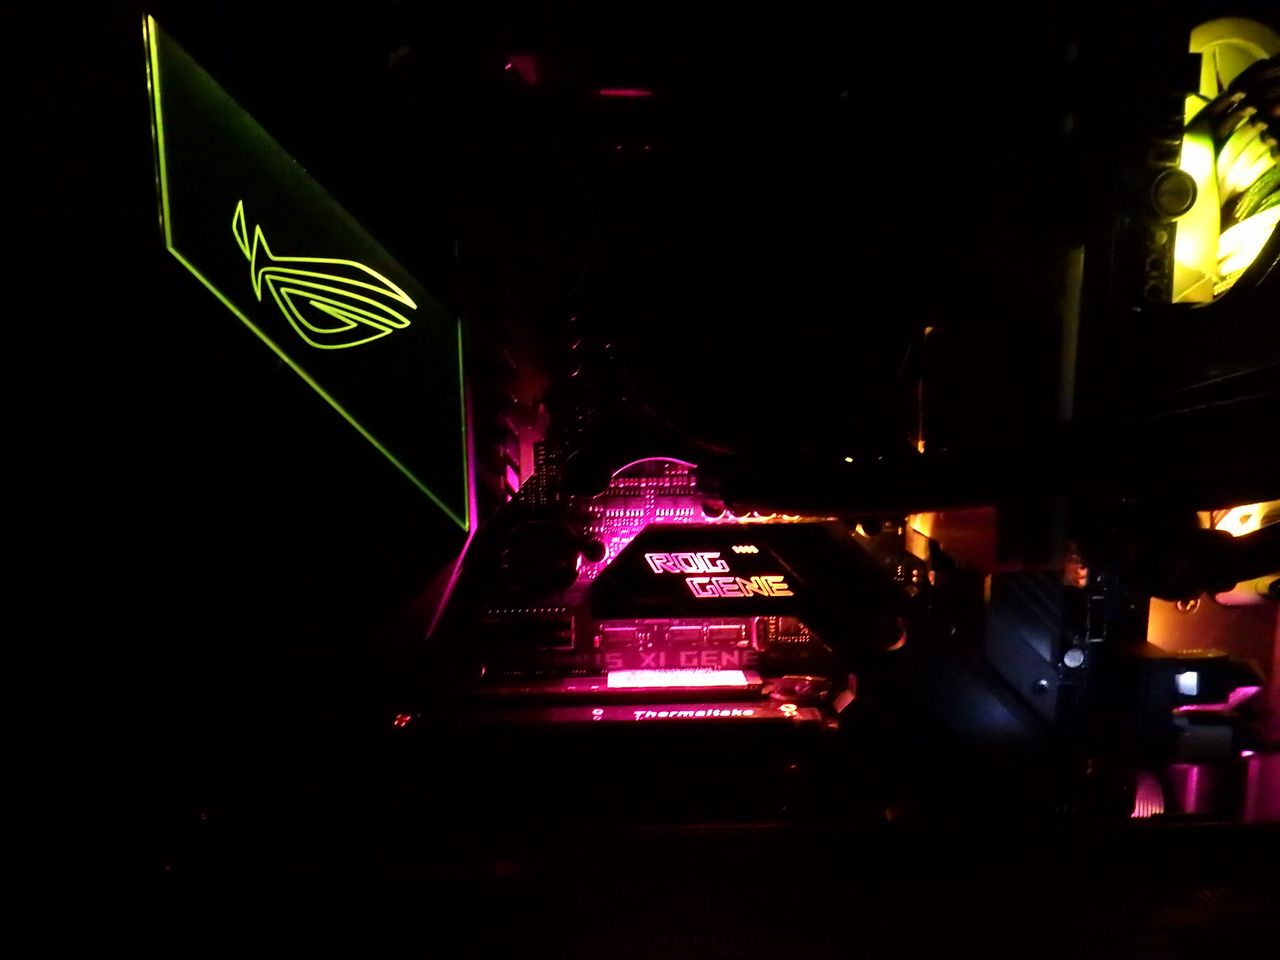
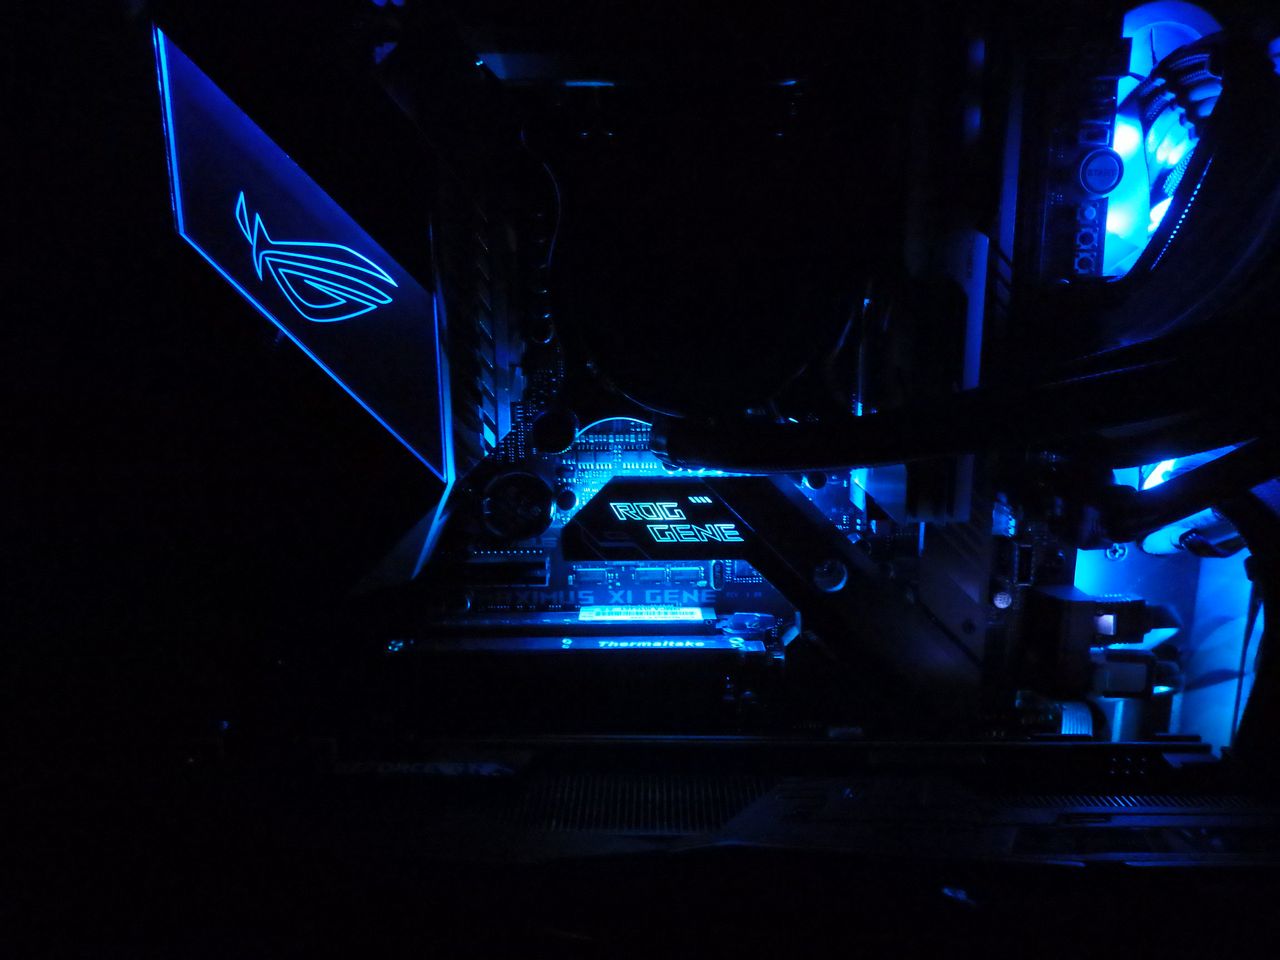
Aesthetically, the rear I/O shroud and chipset heatsink look great with high gloss black finish over a crisp and subtle ROG RGB logo.
It doesn’t photograph well but this branding looks great in a dimly lit room. All RGB can be controlled via the ASUS AURA SYNC software that we’ve seen on other ASUS motherboards and graphics cards.

Multi GPU? Buy an ATX sized board and do it properly…
This board supports a single graphics card – and it makes total sense. The mATX form factor is compact, especially when you try to cram as much technology onto it as ASUS have with the Maximus XI Gene. The placement of dual full-length PCIE slots on this board would have meant that they needed to be one slot apart as we saw with the Maximus VI Gene in 2014. Consider that most high-end graphics cards have coolers with 2 or 2.5 slot shrouds for cooling – even the NVIDIA reference RTX cards have the dual fan open style coolers. This leaves no room at all for airflow – even if you can fit the cards in the slots for a multi-GPU setup. A water-cooled pair of graphics cards would fit – had dual full-length been implemented – but this would suit only a very small section of the target market and would likely have compromised the ROG DIMM.2 module.

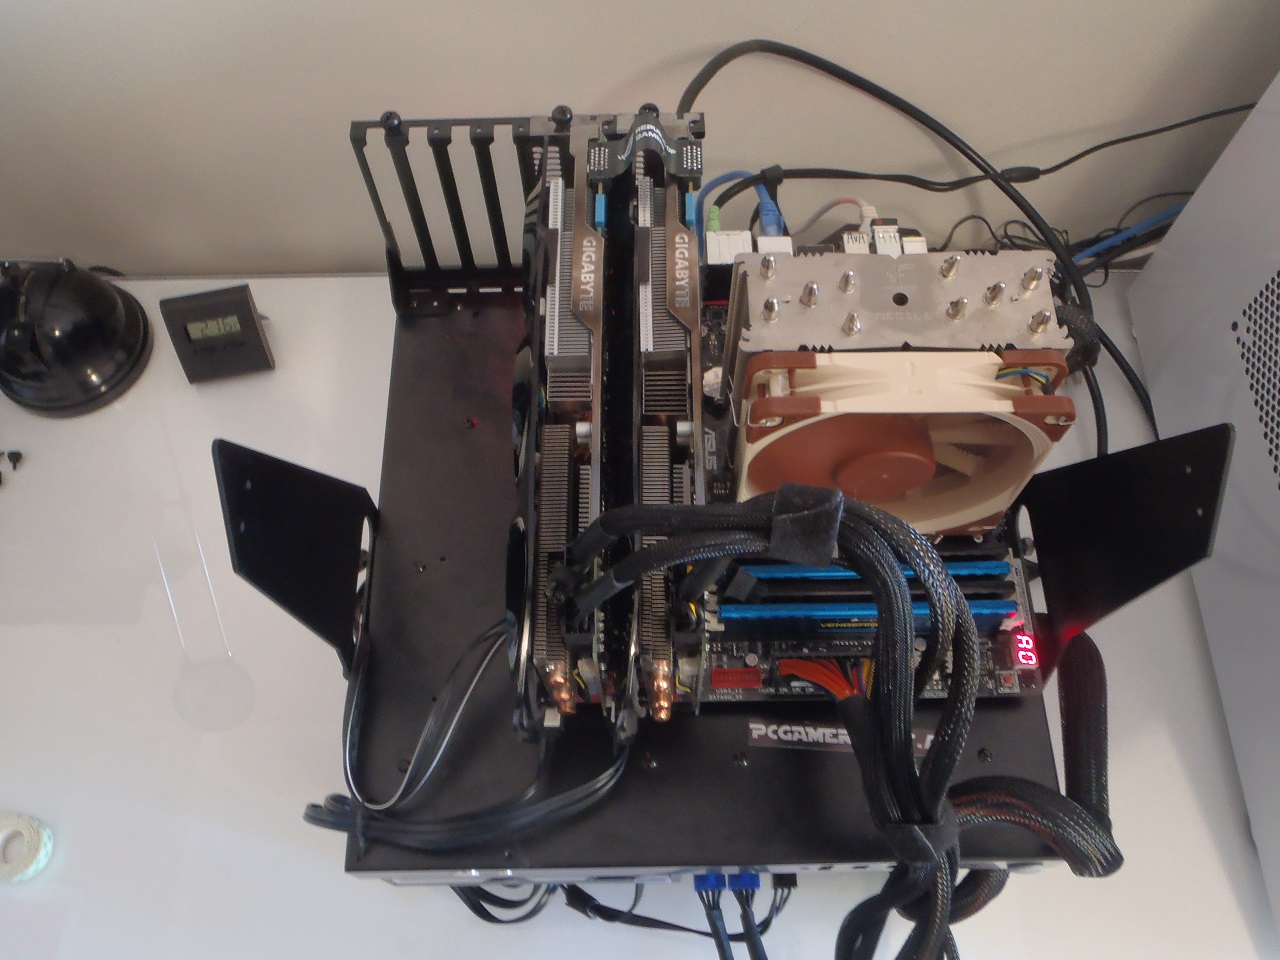
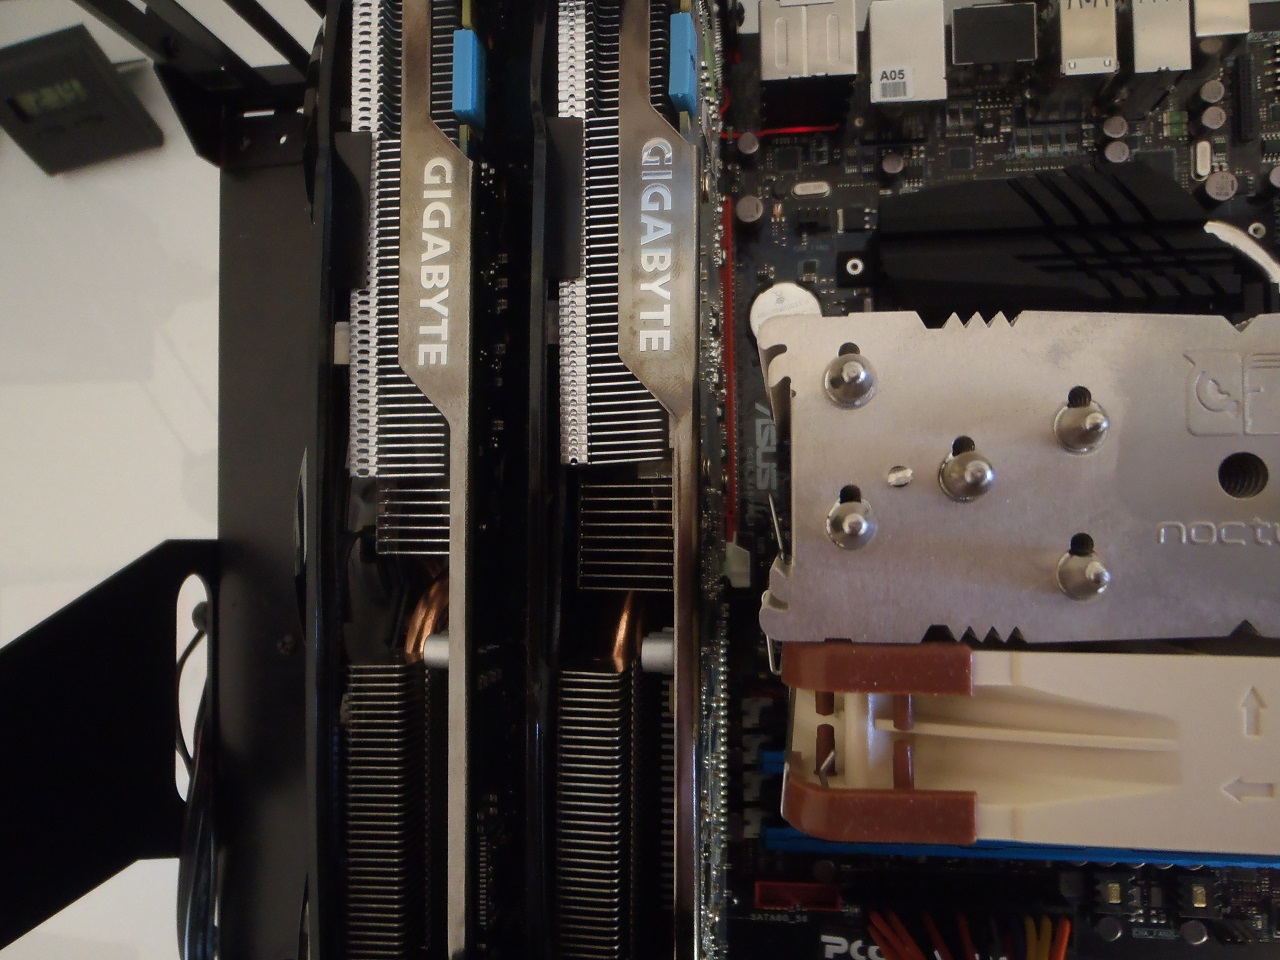
When testing SLI on the older Maximus VI Gene with the dual PCIE x8/x8 configuration it just didn’t work. Reference cards were the only way to go and even then they screamed in high RPM unison. Aftermarket coolers were a no-go and thermally throttled – as we saw with our pair of older Gigabyte GTX 670 Windforce cards. Dual PCIE slots on mATX motherboards just isn’t worth the hassle.
The photos below show the challenge we faced with SLI GTX 670 cards on the older Z87 Maximus VI Gene back in 2014.

Features
Armory Crate
To my surprise, I didn’t need the CD for this installation and I didn’t have to go to the ASUS website to download all the drivers/applications. On the first login to Windows 10, The system prompted me to install ASUS Armory Crate from the motherboard itself. The Armory Crate software then installed the latest versions of everything I needed via the internet for what was the easiest installation I’ve had to date. Considering that optical drives are disappearing from builds and I only use a portable USB DVD drive to load drivers etc, this is both a sign of the times and a great innovation from ASUS.
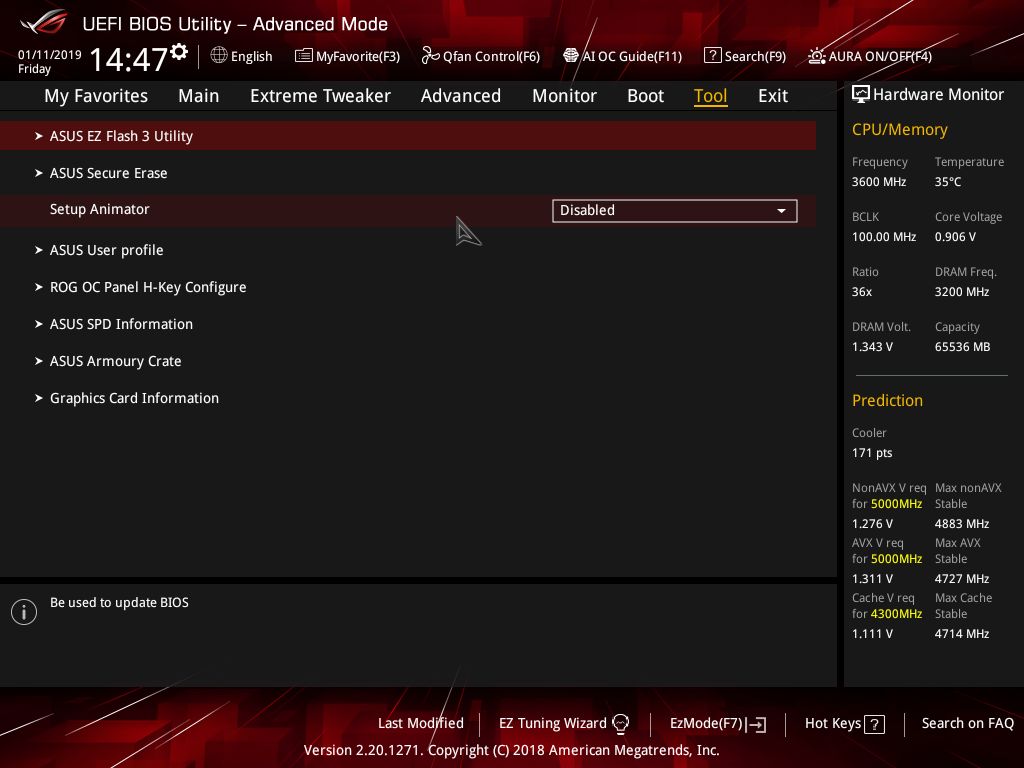
BIOS Flashback
This was a notable omission from the ASUS ROG X470-F STRIX Gaming and I was glad to see it included on the Maximus XI Gene. This feature allows you to update your BIOS with a USB stick by simply pressing a button and waiting for the lights to stop blinking.
Audio
ASUS feature the S1220A CODEC audio with SupremeFX enhancements on their premium boards and it’s a step up from the ALC1220 standard. The ASUS platform has a Signal to Noise ratio of 113dB over the Standard ALC1220 rating of 108dB. Isolation and shielding have been implemented to block electromagnetic interference from other parts of the motherboard or PCIe cards.

I tested the audio with both a Blue Mics “Satellite” headset and the Audioengine A5+ wireless speakers via 3.5mm direct connection. Audio performance was great without any pops, crackles or buzzing. Sound was crisp, clean and sounded true in all content I tried. Movies, games and music were served well by the audio platform on the Maximus XI Gene.
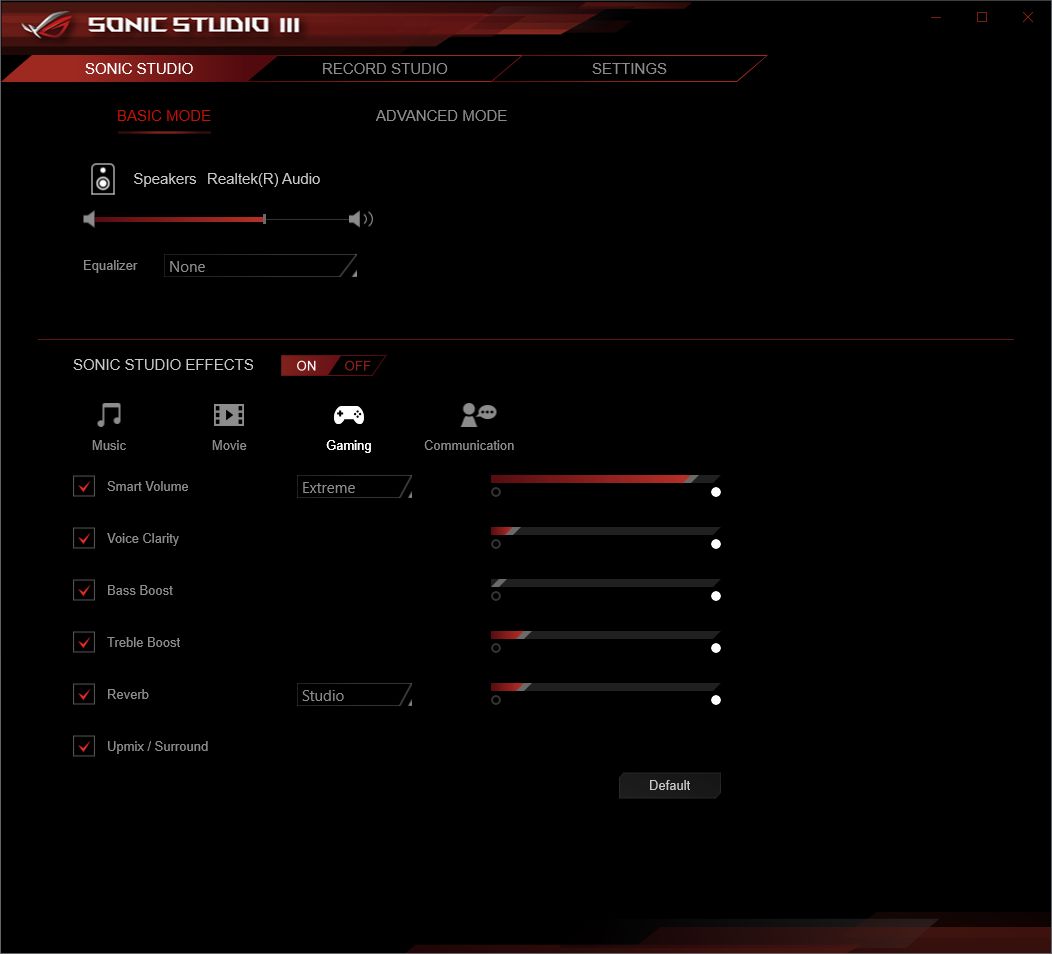
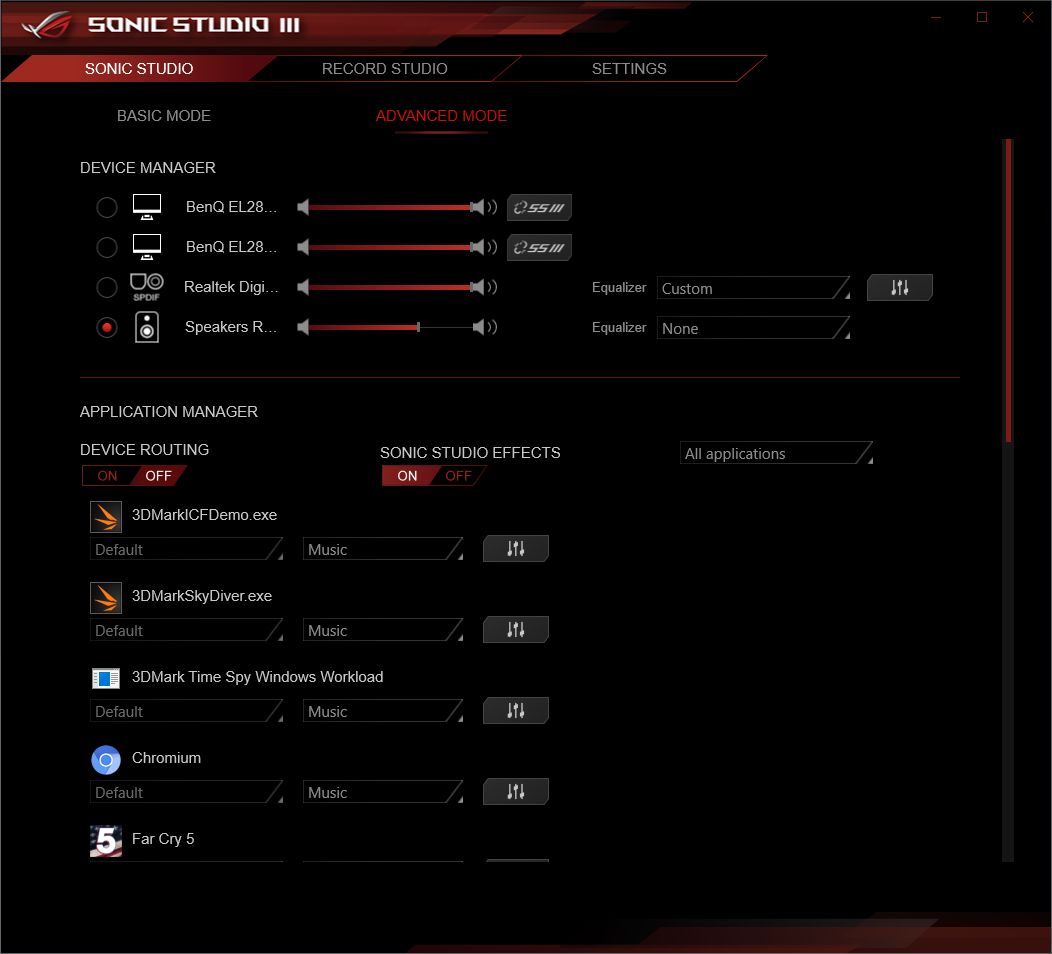
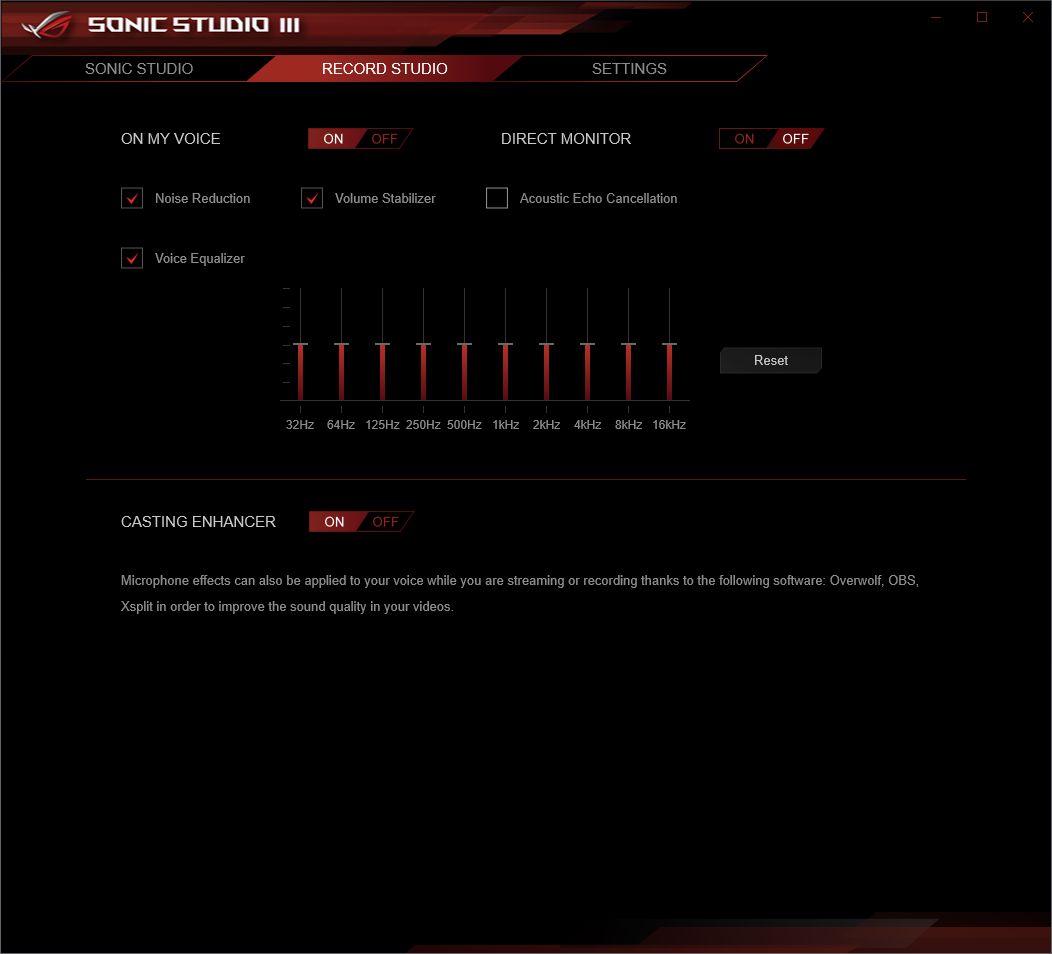
The ASUS Sonic Studio and Sonic Radar software is more sophisticated than any other motherboard audio applications I’ve seen from the other vendors and whilst it isn’t a reason on its own to select this board over another, the software is a valuable addition that I think many people overlook.
Sonic Studio allows you to adjust the audio EQ settings per application/game and even designate the output. In practical terms, you could have Spotify sending audio to the optical output that might be connected to your sound system and you might have the default audio going to your desktop speakers. You may also have typical ‘game’ EQ settings in place for your games but use another profile for Spotify or games like Rocksmith where music is the focus. This functionality means that you don’t have to remember to make adjustments manually every time you start or switch a game.
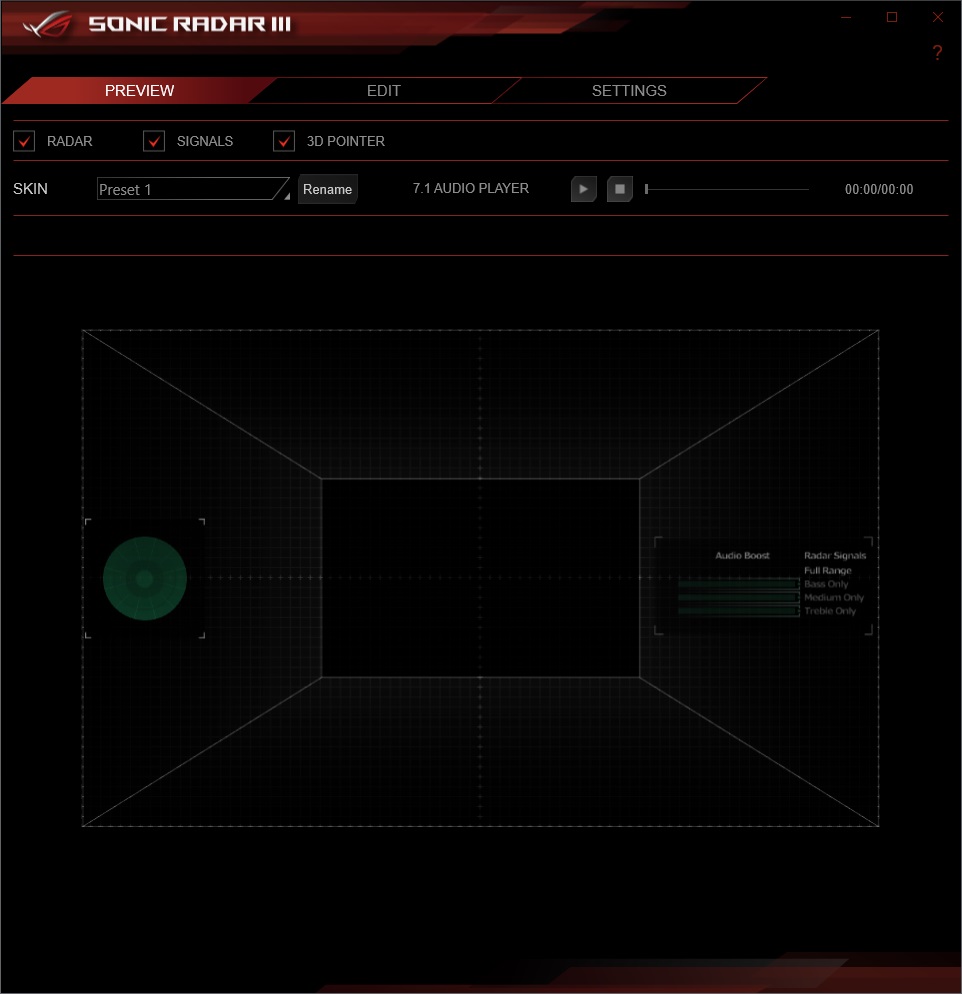
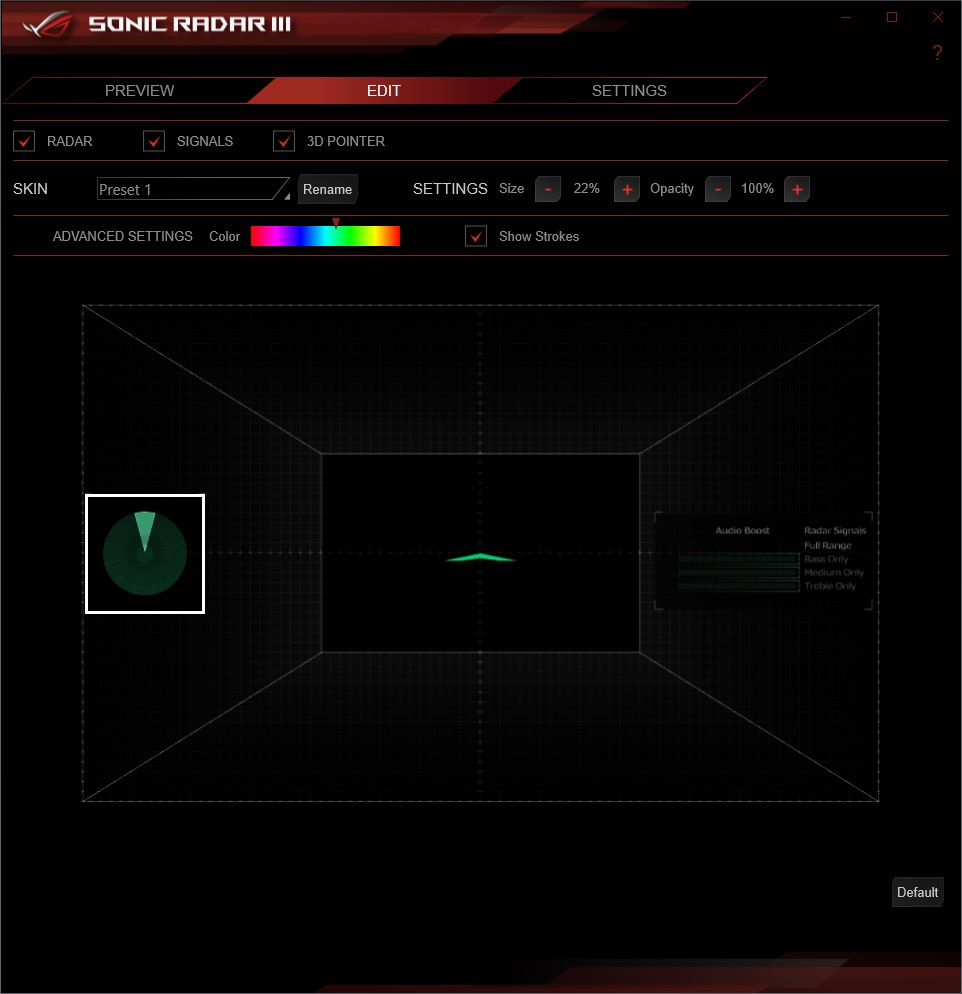
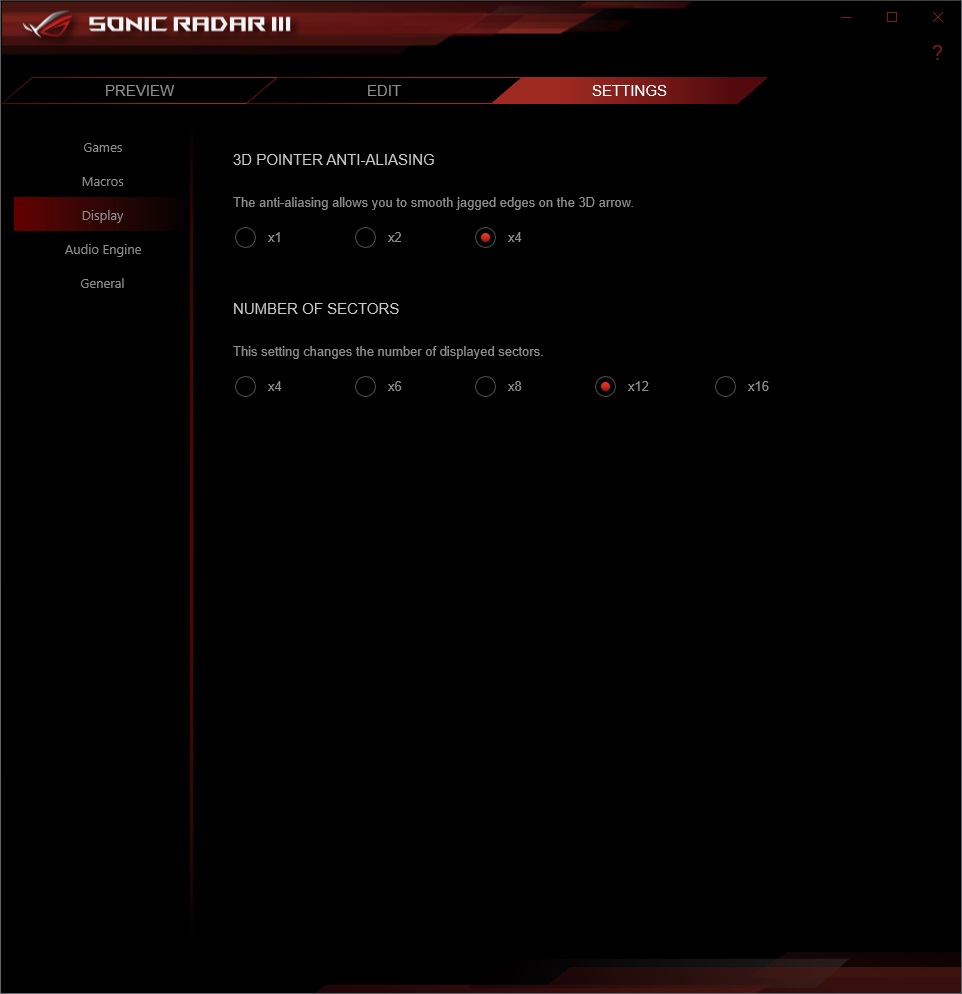
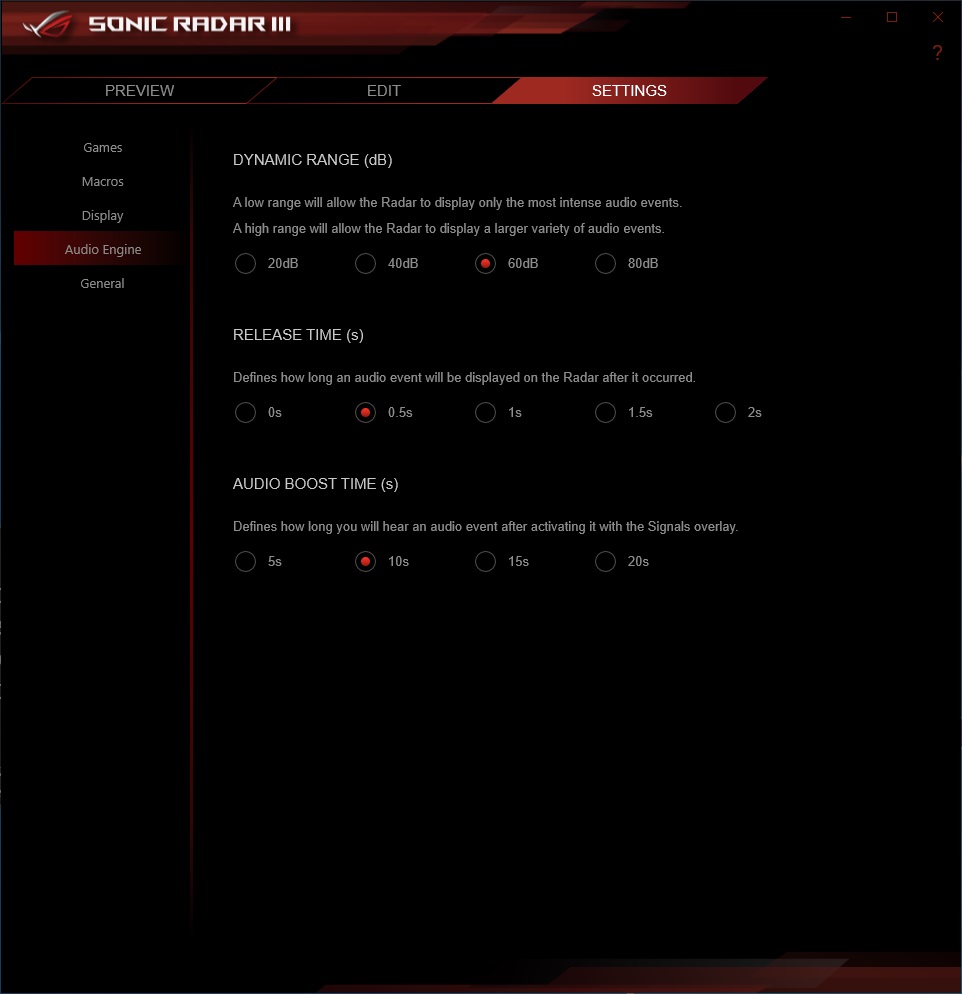
Sonic Radar provides an overlay that shows you where the sound is coming from that can help you determine other players’ positions relative to your own in a game. It works as advertised but isn’t something that I personally use. In first-person shooters, it can be a useful visual cue to seeing where footsteps might be coming from and I could see people giving it a go in Battle Royale titles.


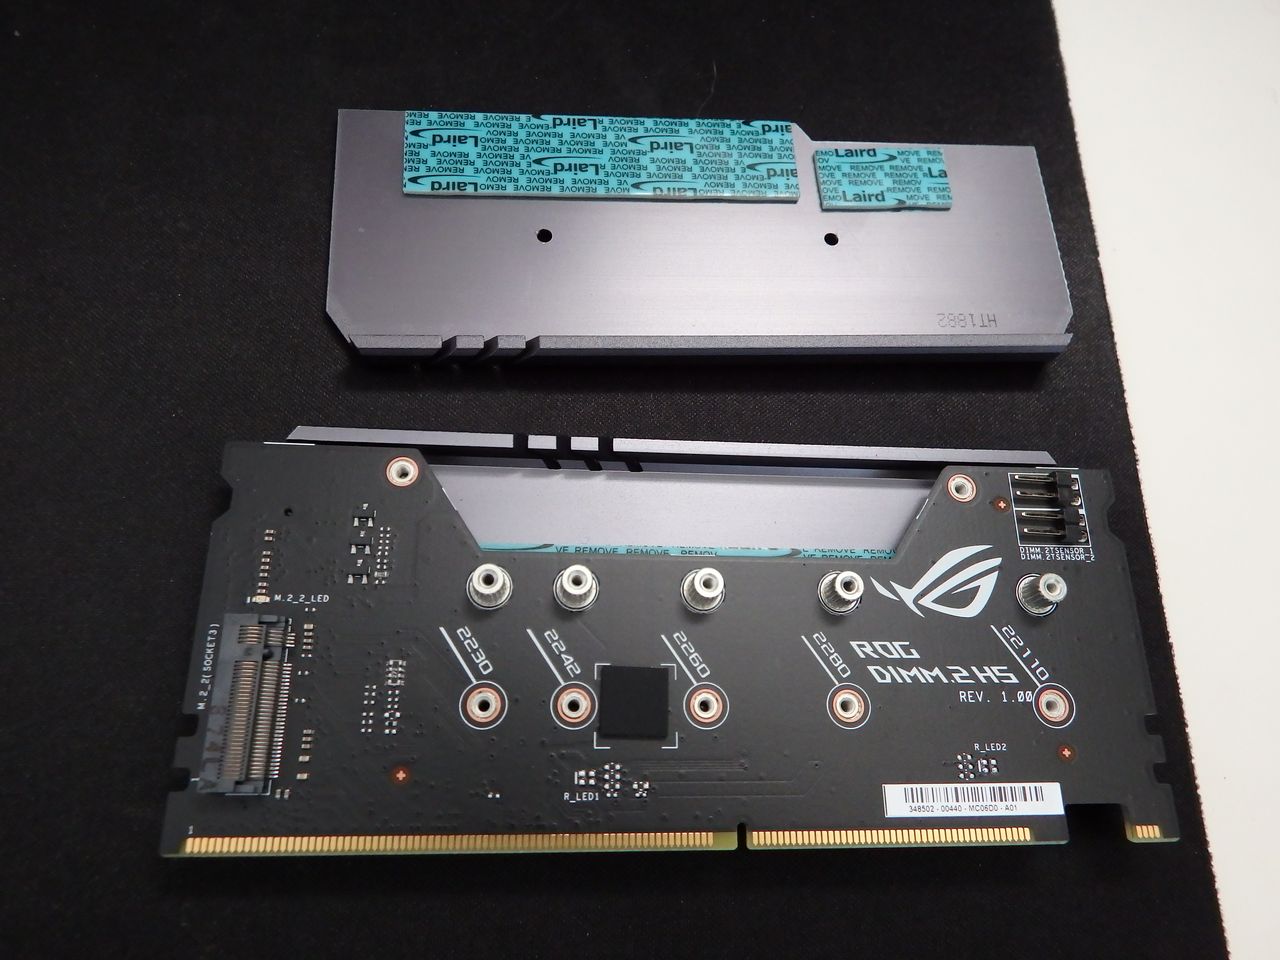
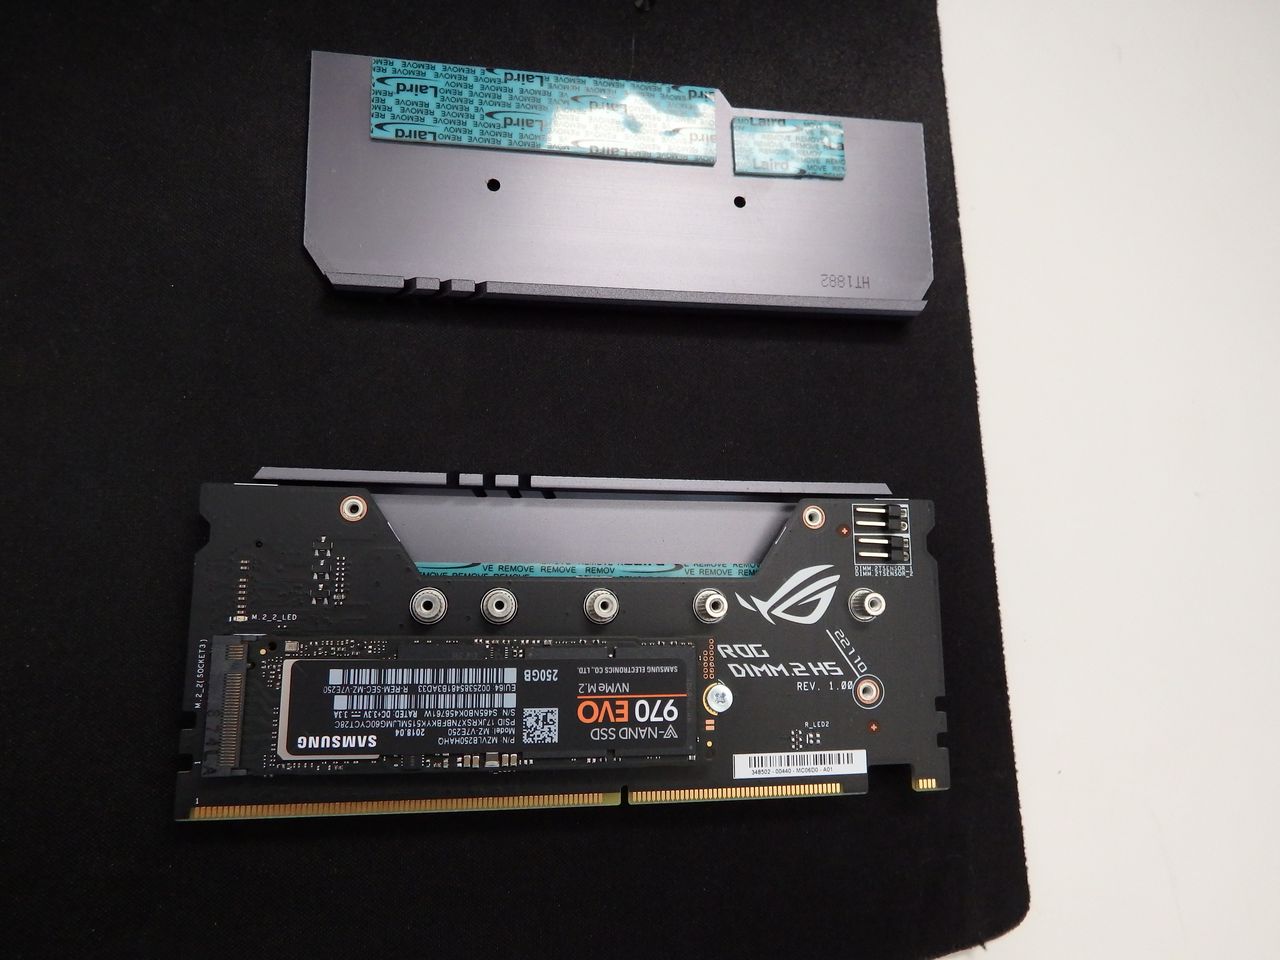
ROG DIMM.2 Module
ROG DIMM.2 is a dual-M.2 expansion card with a heatsink that is vertically installed in the same way as a RAM module. The slot is ‘notched’ to avoid builders trying to jam a memory module in there. The placement of this is logical, away from potentially toasty areas like the CPU socket and graphics card / PCIE slots. The module has dual heatsinks with thermal pads that encase the PCB. One thing to note is that the ROG DIMM.2 module shares PCIE lanes with the PCIE x16 slot so if you use it, this will drop the graphics card down from x16 to x8. There are two thermally shielded M.2 slots on the motherboard that don’t impact on the PCIE x16 slot already so you only need to use the ROG DIMM.2 module for adding a 3rd or 4th M.2 SSD to your system.


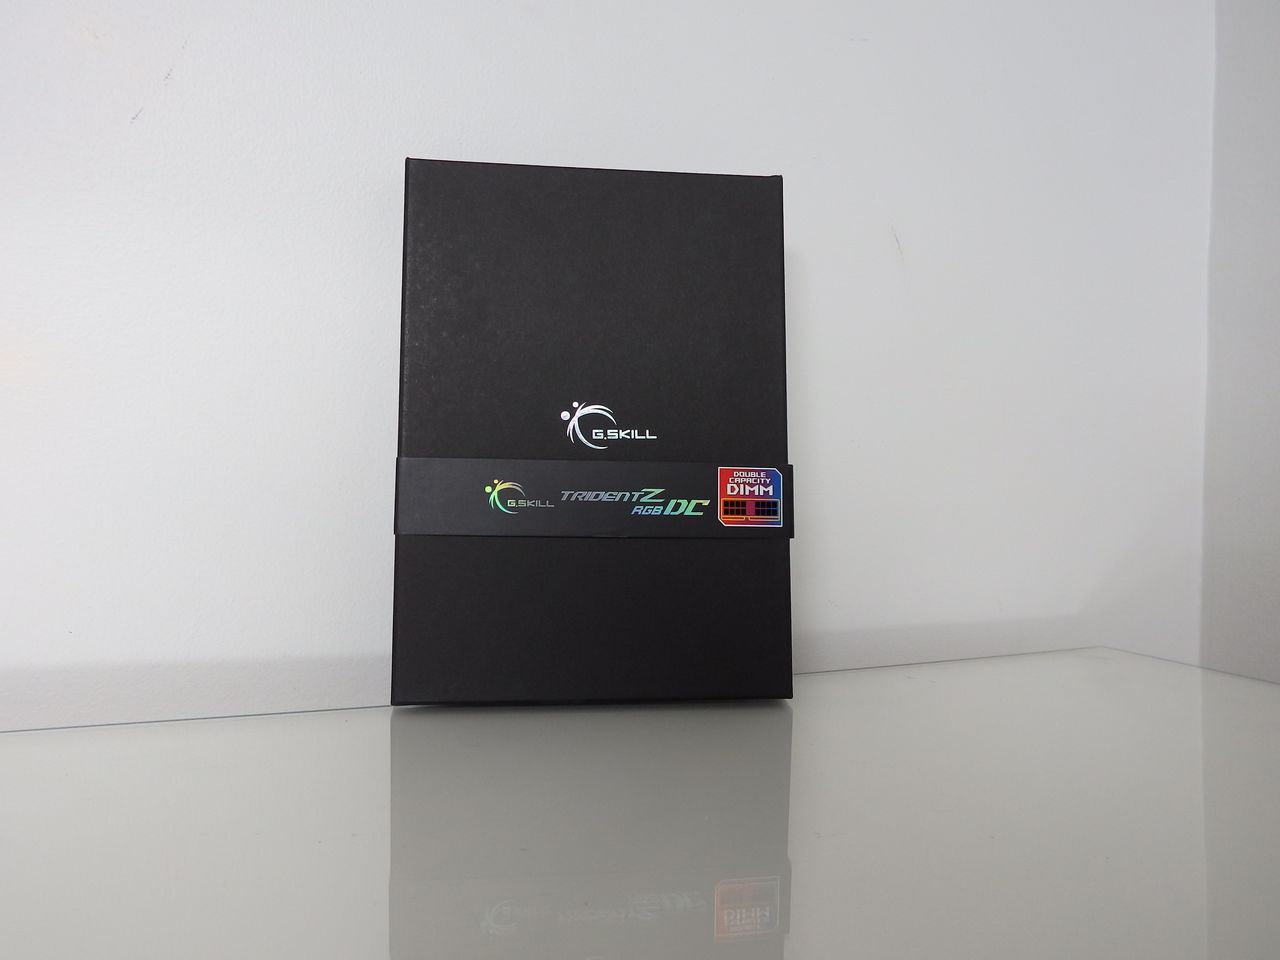
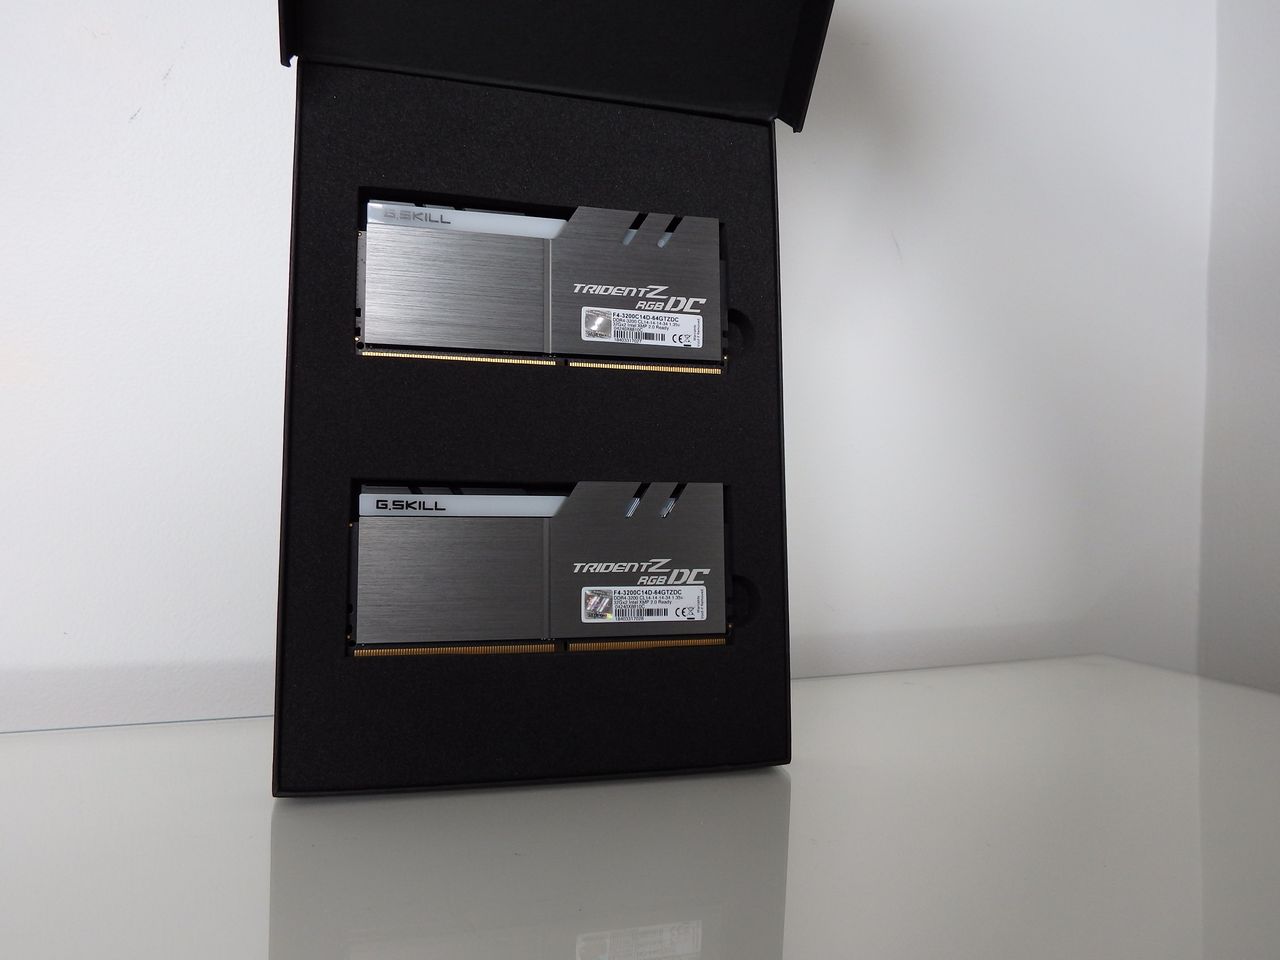
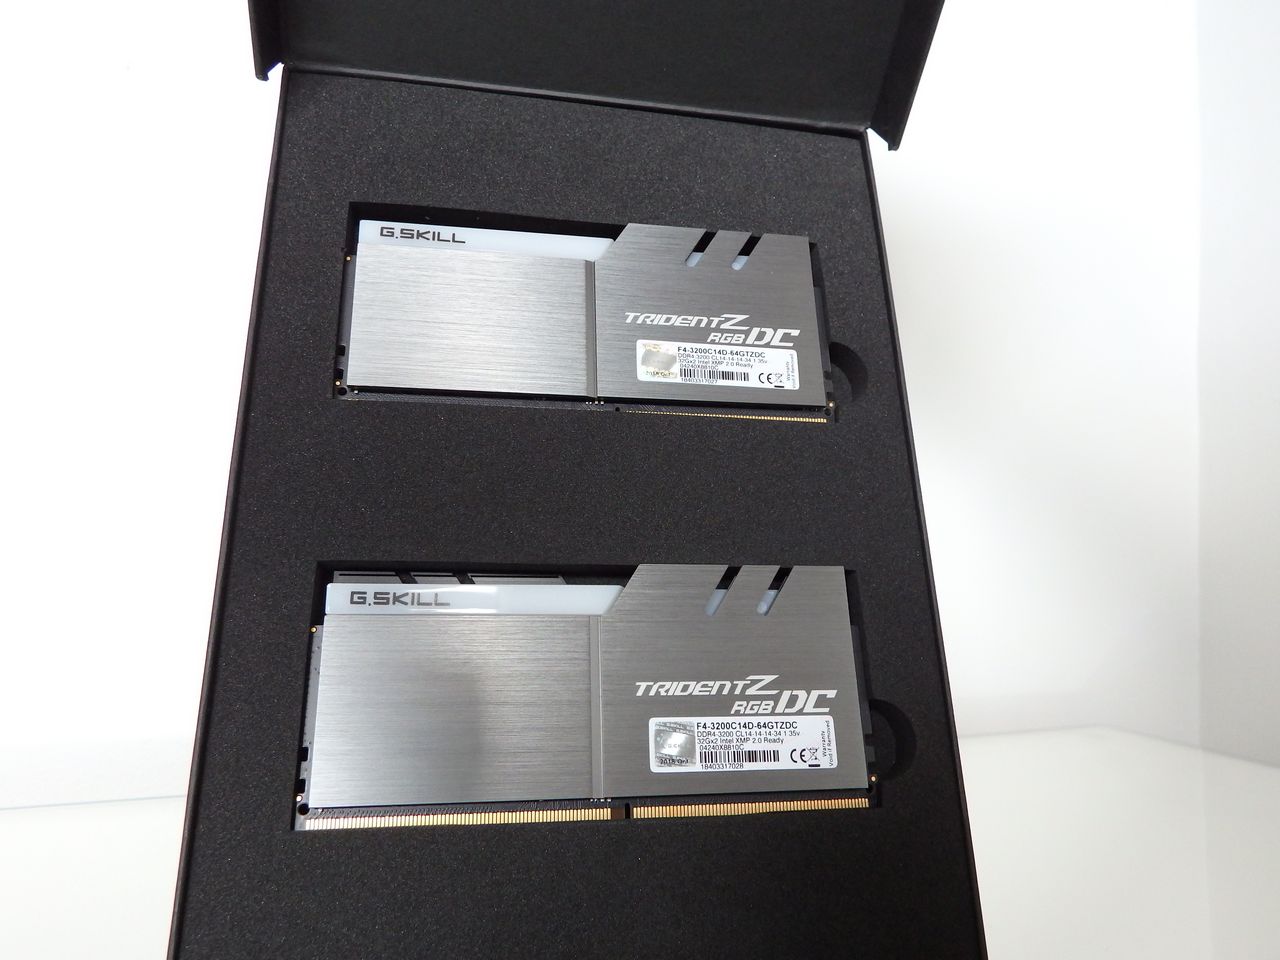
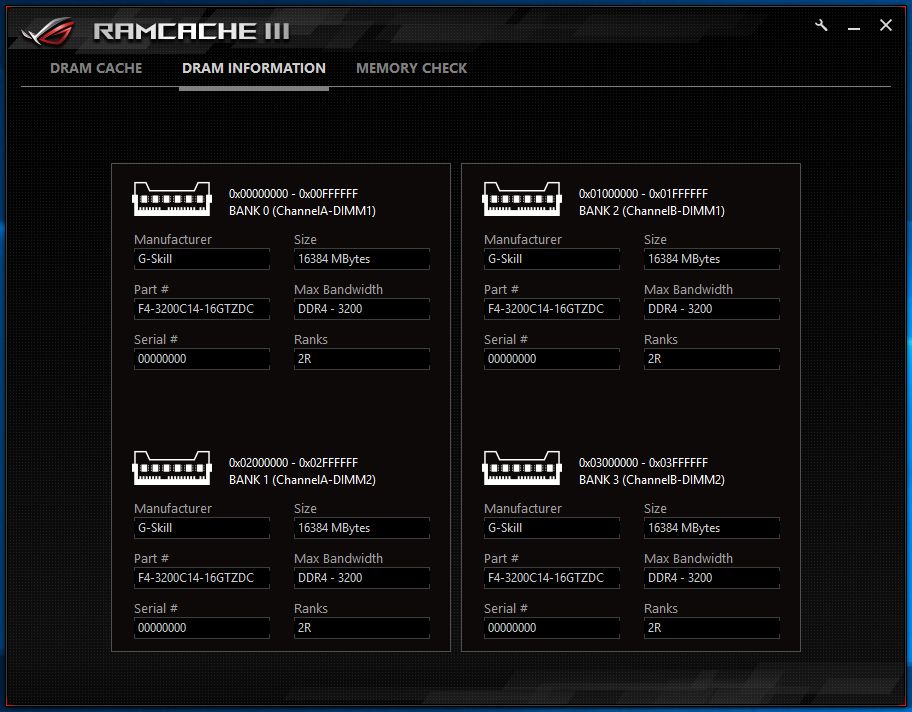
Double Capacity DIMM support
With motherboard real-estate at a premium and only 2 DIMM slots available, ASUS needed to work with memory manufacturers to ensure support for double capacity DDR4 memory. The board still supports dual 32GB kits RAM for 64GB in total. This still provides the memory capacity of a board with four DIMM slots but uses double capacity UDIMM modules to achieve the same result. We tested with the G.SKILL Trident Z RGB DC Series 32GBx2 modules and the G.SKILL FLAREX (2x8GB) 3200MHz modules without encountering any compatibility or performance issues.
Double capacity DDR4 modules aren’t cheap but neither is a 9th Gen Intel CPU or this board. The Maximus series allows enthusiasts to connect top-of-the-range components so it’s important to remember that an ultimate build like this would have an ultimate price tag to match.


Cooling
Cooling and thermal monitoring is a clear focus for the Maximus XI Gene and after testing the i9-9900K this is a good thing because that CPU needs to be supervised when going all out. The Maximus XI Gene includes:
- Multiple temperature sources with headers and thermal sensors
- 4-pin PWM/DC fan
- Water pump+
- AIO pump
- Full Speed PWM headers (white)
- Water flow and water in/out monitors
As we’ve seen in other ASUS ROG boards, every onboard header has auto-detection of PWM or DC fans. There is also a dedicated fan header that can supply over 3A to high-performance PWM or DC water pumps.
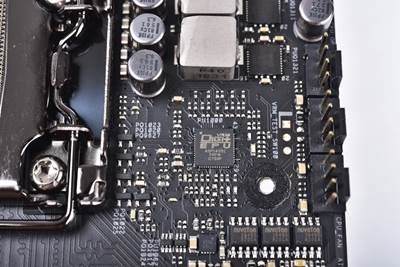
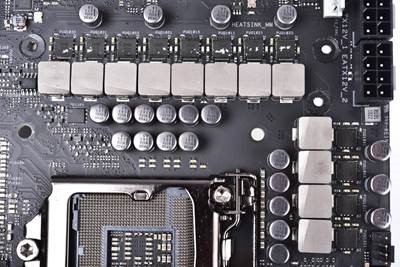
VRM Configuration
The power solution is driven by an ASP1405I PWM IC made up of 10(Vcore)+2(iGPU) power stages based on an IR3555M alloy choke and 10K rated capacitors in Twin-Phase (N phase, 2N Power Stages) providing a faster response. The PWM IC also supports what ASUS calls “T-Prob” for an even distribution of load among all active power stages.
There is a high thermal conductivity thermal pad and high efficiency thermal heatsink featuring high surface area heat spreader with a heat pipe to ensure a fast and even spread of heat among the power phases.
Control and visibility of system metrics
ASUS has provided an extensive (almost excessive) level of physical monitoring and isolation controls to the Maximus XI Gene. You won’t see these on the average or even above average boards. This level of hardware control is reserved for the top shelf products.

- On the top right corner of the board, there is an obvious LED display for error codes that are conveniently listed in the manual
- Beneath the larger LCD panel, there are 4 individual LEDs that show the boot status/progression to help identify if an issue is CPU, GPU or RAM related. This helps bring on that facepalm moment when you realise that you forgot to connect those PCIE power cables to the graphics card or that you didn’t seat the memory properly
- The MEMOK! II switch allows for DRAM auto training to find optimal profiles that work with your memory modules
- The obvious buttons are Start and Reset
- There is a jumper for liquid-nitrogen options should this board be used for extreme overclocking and enable the use of Pause and Slow Mode switches. The “Pause” switch allows the adjustment of overclocking parameters during a benchmark while “Slow Mode” switch will drop the CPU ratio to 8x. Both of these options are provided to assist with navigating benchmarks and identifying where specific overclocking tweaks need to be made
- A previously known good/safe configuration can be recalled using the “safe boot” button
- A retry button that initiates a hard reset but retains the same settings from the previous attempt without displaying the failed OC message and resetting to either default or the last known good configuration.
- Finally, there is a ProbeIt section on the motherboard that you can use with a multi-meter to check voltages

Aura Sync
The RGB lighting options are well managed by the Aura Sync Software and this even links up with any Philips Hue smart lighting kits in your home or office. You can run different lighting themes with or without effects – alternatively, you can also disable the RGB completely to run dark if needed.
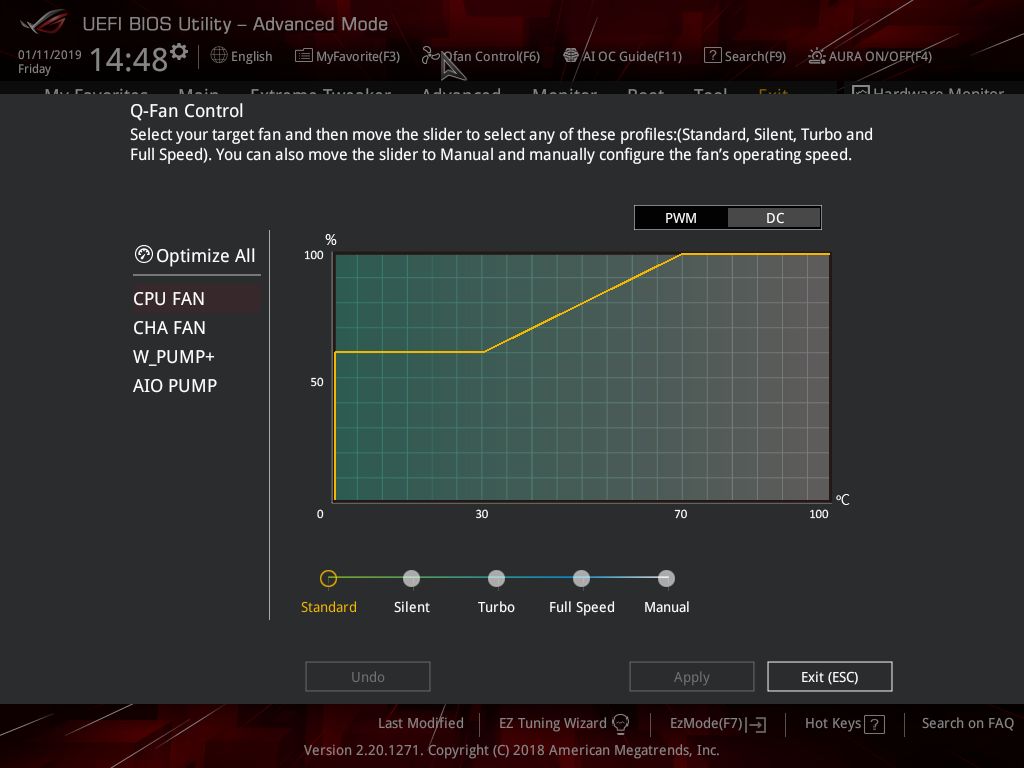
ASUS 5-Way Optimisation
This feature shouldn’t be underrated. This is an automated process to overclock your CPU and tune all fans in the system to operate quietly and efficiently. All you have to do is click start and the program does the rest. The results that we saw with the 5-Way Optimisation were essentially the same as what we achieved with a manual overclock on the 9900K.
For people that are not confident with manual overclocking, this allows them to unlock some extra value from their CPU without the hassle or unease that can come with tweaking.

Network connectivity
The Intel Gigabit Ethernet and CNVi 2×2 802.11ac Intel integrated Wi-Fi performed on par with other wired and wireless offerings that we’ve seen on other boards (including those with different chipsets). Throughput between the Maximus XI Gene and our Gigabit router was per our best results and Wi-Fi was solid from the next room through a stud wall.
What makes the network connectivity stand out on the ROG boards – including the Maximus XI Gene – is the GameFirst V software that allows you to perform QOS and device assignment for the PC. GameFirst allows users to define what network device is assigned to which application so you can assign the Wi-Fi connection to some programs and reserve the Gigabit Ethernet to others. Of course, you can also prioritise different traffic/applications so that when you’re gaming, everything else takes a back seat. I’d recommend disabling sporadic bandwidth hogs like peer-to-peer when playing a game where your ping matters but it is nice to know that you can have the ASUS utility manage that for you.
Specifications
| CPU | Build in Intel® 9th / 8th Gen Intel® Core™, Pentium® Gold and Celeron® Processors Supports Intel® Turbo Boost Technology 2.0 * Refer to www.asus.com for CPU support list |
| Chipset | Build in Intel® Z390 |
| Memory | Socket 1151 for 9th / 8th Gen Intel® Core™, Pentium® Gold and Celeron® processors 2 x DIMM, Max. 64GB, DDR4 4800(O.C.)/4700(O.C)/4600(O.C)/4500 (O.C)/4400(O.C)/4266(O.C.)/4133(O.C.)/4000 (O.C.)/3866(O.C.)/3600(O.C.)/3466(O.C.)/3400 (O.C.)/3333(O.C.)/3300(O.C.)/3200(O.C.)/3000(O.C.)/2933(O.C.)/2800 (O.C.)/2666/2400(O.C.)/2133(O.C.) MHz Non-ECC, Un-buffered Memory * Dual Channel Memory Architecture Supports Intel® Extreme Memory Profile (XMP) * Refer to www.asus.com for the Memory QVL (Qualified Vendors Lists). * Double Capcity DRAM support depends oh the DRAM models |
| Graphic | Integrated Graphics Processor- Intel® UHD Graphics support - Supports HDMI 1.4b with max. resolution 4096 x 2160 @ 30 Hz |
| Expansion Slots | Socket 1151 for 9th / 8th Gen Intel® Core™, Pentium® Gold and Celeron® processors 1 x PCIe 3.0 x16 Intel® Z390 Chipset 1 x PCIe 3.0 x4 |
| Storage | Socket 1151 for 9th / 8th Gen Intel® Core™, Pentium® Gold and Celeron® processors : 2 x ROG DIMM.2 Module support(CPU_DIMM.2), with M key, type 2242/2260/2280/22110 storage devices support (PCIE 3.0 x 4 mode) Intel® Z390 Chipset : 2 x M.2 Socket 3, with M Key, type 2242/2260/2280 storage devices support (x4 PCIE mode) Intel® Z390 Chipset : 4 x SATA 6Gb/s port(s), Support Raid 0, 1, 5, 10 Intel® Optane™ Memory Ready |
| LAN | Intel® I219V, 1 x Gigabit LAN Controller(s) Anti-surge LANGuard ROG GameFirst Technology |
| Wireless Data Network | Intel® Wireless-AC 9560 Wi-Fi 802.11 a/b/g/n/ac Supports dual band frequency 2.4/5 GHz Supports MU-MIMO Supports channel bandwidth: HT20/HT40/HT80/HT160. Up to 1.73Gbps transfer speed |
| Bluetooth | Bluetooth® 5.0 |
| Audio | ROG SupremeFX 8-Channel High Definition Audio CODEC S1220A - Impedance sense for front and rear headphone outputs - Supports : Jack-detection, Multi-streaming, Front Panel Jack-retasking - High quality 120 dB SNR stereo playback output 113 dB SNR recording input Audio Feature : - SupremeFX Shielding™ Technology - Gold-plated jacks - Optical S/PDIF out port(s) at back panel - Sonic Radar III - Sonic Studio III + Sonic Studio Link |
| USB Ports | Intel® Z390 Chipset : 1 x USB 3.1 Gen 2 front panel connector port(s) Intel® Z390 Chipset : 4 x USB 3.1 Gen 2 port(s) (3 x Type-A+1 x Type-C) Intel® Z390 Chipset : 8 x USB 3.1 Gen 1 port(s) (2 at mid-board) Intel® Z390 Chipset : 6 x USB 2.0 port(s) |
| ROG Exclusive Features | ROG CPU-Z ROG CloneDrive Pre-mounted I/O Shield Slow Mode CMOS button Overwolf ReTry Button Safe Boot Button Start Button Reset Button LN2 Mode ROG Aura - Aura Lighting Control - Aura RGB Strip Headers Extreme Engine Digi+ : - MicroFine Alloy Chokes - 10K Black Metallic Capacitors Mem TweakIt Double Power : - Dual 8 -pin CPU USB BIOS Flashback ROG Exclusive Software - RAMCache III - GameFirst V - Sonic Studio III + Sonic Studio Link - Sonic Radar III |
| Special Features | AI Overclocking ASUS 5X Protection III : - ASUS LANGuard: Protects against LAN surges, lightning strikes and static-electricity discharges! Gamer's Guardian: - SafeSlot ASUS Optimem II: - Optimem (Improved DDR4 stability) - Improved DDR4 Stability ASUS Exclusive Features : - MemOK! II - Pre-mounted I/O Shield - ASUS NODE : hardware control interface - BIOS Flashback Button - Clear CMOS Button - Reset Button ASUS Quiet Thermal Solution : - ASUS Fan Xpert 4 ASUS Q-Design : - ASUS Q-Code - ASUS Q-LED (CPU, VGA, Boot Device LED) - ASUS Q-Slot - ASUS Q-DIMM - ASUS Q-Connector AURA: RGB Lighting Control Armoury Crate |
| Operating System Support | Windows® 10 64-bit |
| Back I/O Ports | 1 x PS/2 keyboard/mouse combo port(s) 1 x HDMI 1 x LAN (RJ45) port(s) 3 x USB 3.1 Gen 2 (red)Type-A, 1 x USB 3.1 Gen 2 (red)Type-C 6 x USB 3.1 Gen 1 (blue) 2 x USB 2.0 1 x Clear CMOS button(s) 1 x Wi-Fi antenna port( |
| BIOS | 1 x 128 Mb Flash ROM, UEFI AMI BIOS, PnP, DMI3.0, WfM2.0, SM BIOS 3.0, ACPI 6.0, Multi-language BIOS, ASUS EZ Flash 3, CrashFree BIOS 3, F11 EZ Tuning Wizard, F6 Qfan Control, F3 My Favorites, Last Modified log, F12 PrintScreen, F3 Shortcut functions and ASUS DRAM SPD (Serial Presence Detect) memory information. |
| Manageability | WfM2.0, DMI3.0, WOL by PME, PXE |
| Support Disc | Overwolf 1-year Anti-Virus software Daemon Tools Software WinRAR |
| Form Factor | mATX Form Factor 9.6 inch x 8.9 inch ( 24.4 cm x 22.6 cm ) |
Build Quality
Let’s look at the heritage for a moment. The Z87 Maximus VI Gene I reviewed in January 2014 remained a favourite and we used it in projects until late last year when we finally retired it to a more portable VR system. Obsolescence finally caught up with it, but that board is still as reliable as the day I reviewed it despite being heavily used for almost 5 straight years. I never had a single issue, glitch, frustration or negative moment with that motherboard or the supporting software. This is the way it should be with top end motherboards and for me, the Maximus VI Gene has set the benchmark.
Per other ROG boards, we see the ASUS SafeSlot which protects against interference and physical damage to the PCIE slots with reinforced anchor points and metal reinforcement. There is also a pre-mounted I/O shield and the expected premium components that we’ve seen implemented for years by ASUS on their ROG motherboards that improves the already high likelihood that they will be well overdue for replacement before they fail on you.
I can’t fault the build quality of this motherboard and there is no reason to doubt that it will go the distance based on the performance in testing, the look and feel of the board, the measures taken by ASUS to fortify the board physically and our experience with previous ASUS motherboards. Our track record with other ASUS boards which has seen us literally running a P8Z77-V Deluxe 24×7 for almost 6 years as a home file server and gaming workstation.
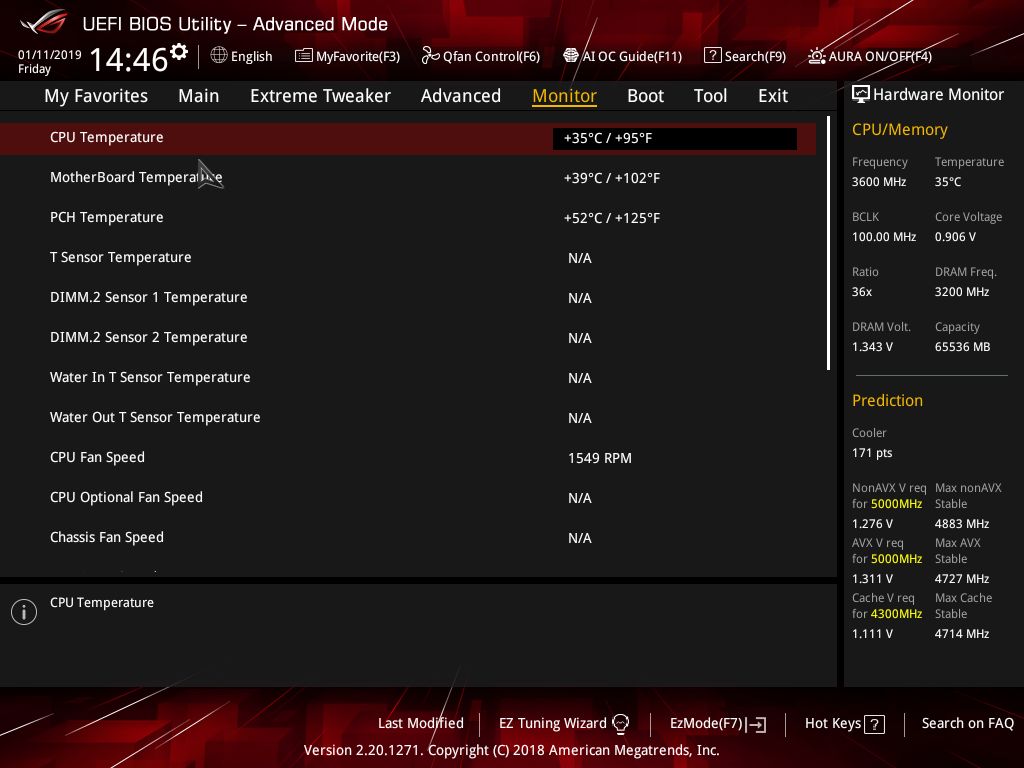
BIOS / UEFI
ASUS ROG UEFI has always been extensive and the Maximus XI Gene is no exception. We even have some new features like an assessment of the CPU capabilities and cooling potential of your CPU cooler. This helps to set an expectation of the overclock you might be able to get…or not.

Everything is in a logical place and it’s easy to navigate. Novice users will be able to get around but may need to rely on Google from time to time to read up on the hardcore areas.
Personally, I hate (yes, hate) updating BIOS and unless testing requires otherwise, I always update from a USB stick rather than online or via a Windows application. A bad BIOS flash can really ruin your day which is why I was pleased to see the inclusion of BIOS Flashback – a means to re-flash the BIOS from a USB stick with the touch of a physical button on the rear I/O shield. In my testing of the Maximus XI Gene, I didn’t need to use it and the update I performed using the standard BIOS USB stick method went without incident.


Software suite
This is a legitimate value add on the ASUS ROG series boards and the functionality includes things that I can actually use and regularly do on our X470-F STRIX test bench which uses the same ROG utilities.
I’ve already covered off Gamefirst V network prioritisation software, Sonic Radar and Sonic Studio but there are three more utilities that I want to highlight because they are awesome and things that you don’t tend to see in other motherboard software bundles.
AI Suite
AI suite could be mistaken for just another control centre application to monitor temps, tweak some volts/multipliers and set your fan speeds but it’s the way the software does it that’s impressive. You can set the power levels, the phase options, overclocking (per core or all at once), enable power saving and set alerts – as is possible in some competing utilities. Dual Intelligent Processors 5 has a prediction feature that tells you what to expect from the cooling/CPU combination and while this is also available in BIOS, there are many enthusiast gamers who are much more comfortable with a Windows application than going into the BIOS. The 5 Way Optimisation function also means that you can simply click on a “start” button and have the ASUS utility overclock your system, tune your fans and deliver a safe overclock without any real risk. The overclock isn’t overly conservative either. On this motherboard, the X399 Zentih Extreme and the X470-F Strix Gaming, the overclock delivered by the 5 Way Optimisation routine was only marginally behind or on par with what we managed to achieve manually – albeit without going too nuts with volts.
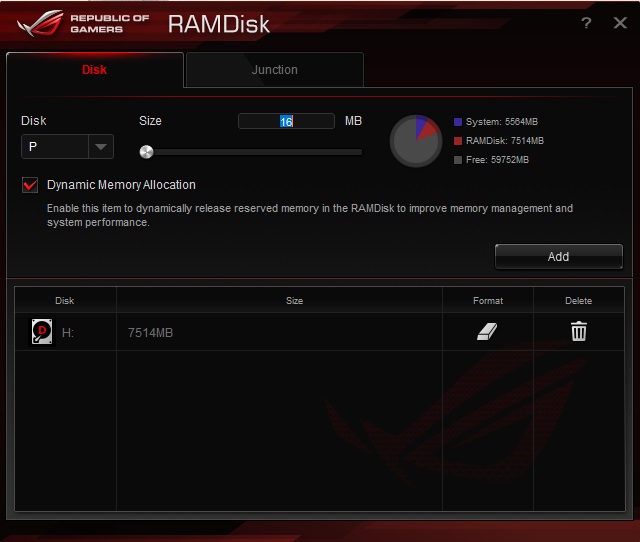
RAMDISK
If you have enough RAM, you can create a RAMDISK that looks and behaves like a logical volume but resides on volatile (but fast) DDR4. This is useful to reduce the read/write cycles on an SSD or to speed up access time for project work where you need to manipulate a lot of files, especially small ones. The system can save an image of the RAMDISK to non-volatile storage (SSD or HDD) on shutdown and then load the image on boot if you want.
One thing to note is that when you set the allocation, you’re setting the maximum not a constant value like RAMCACHE. This means that if you don’t need to use the full RAMDISK size, it won’t.


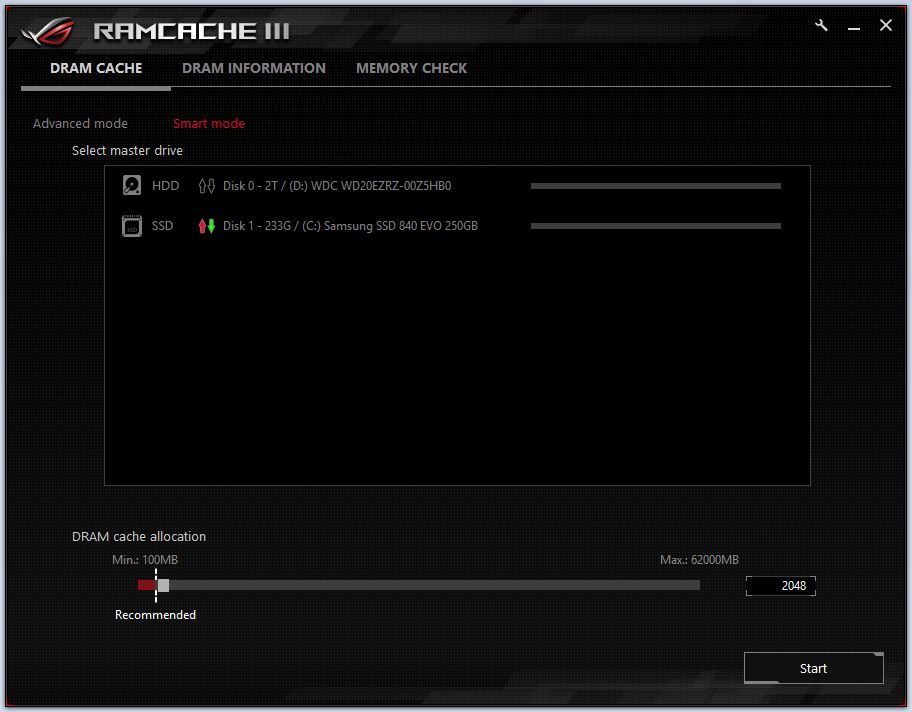
RAMCACHE III
As opposed to RAMDISK, RAMCACHE III will intelligently cache frequently accessed files to memory so that as these are accessed, the system can read the data much, much faster. The Crystal disk mark images below show how much faster the read/write times are for the same drive with RAMCACHE III enabled.
It works by setting a portion of system memory aside as a cache and you can let the utility use that allocation to cache all drives or perhaps just target a single drive. This is the application that I value the most in the whole package. This is an absolute godsend when you need to reload a save game or level as subsequent loads are significantly faster than the initial load due to the caching. Some games preload different parts of a map as you move between areas – depending on the amount of memory you have to play with, this can make a big difference to how seamless a game feels and increase your immersion.

Testing
Test System Specification
We went with a new look test bench for our Intel i9-9900K testing. Thermaltake came through with the Core P3 Curved, an 850W Toughpower I series PSU and a Floe Riing 360mm AIO cooler.
- Intel i9-9900K
- G.SKILL Trident Z RGB DC Series 32GBx2
- HyperX Predator 2933 RGB 8GBx2 (RGB testing and Compatibility)
- G.SKILL Flare-X 3200 8GBx2
- G.SKILL SniperX 3400 8GBx2
- ASUS STRIX GTX 1080Ti OC
- Thermaltake Core P3 Curved Case
- Thermaltake Floe Riing 360mm AIO
- Thermaltake TOUGHPOWER iRGB PLUS 850W PSU
- Samsung EVO 850 250GB SATA SSD
- Samsung EVO 970 NVMe M.2 SSD
- WD Blue 4TB SSHD
- BenQ EL2870U Monitor
Observations
Stability
I experienced 2 system lockups on this platform when benchmarking without an overclock. I wasn’t able to reproduce the issues. One crash was in Blender and the run locked up once but ran 9 other times without an issue, the other lock up was in PCMark10 but the benchmark ran 4 other times successfully.
Gaming
I thoroughly enjoyed my gaming experience on the Maximus XI Gene. There were no driver issues, troubleshooting required or niggles. The default fan tuning profile delivered essentially silent running at idle and low load but gently ramped up only hitting the higher levels in extreme benchmarks and torture tests.
Gaming audio sounded good via both the Audioengine A5+ wireless and Blue Satellite headset (both connected via 3.5mm jack). The clarity of music soundtracks such as Elder Scrolls Online or battlefield noise from Battlefield 1 and Call of Duty Black Ops 4 was unimpeded.
RAMCACHE III
I only used this feature once all the benchmarking had been completed and the difference in game load times was noticeable. I’d recommend this application to anyone and I use it (when not benchmarking) on the ASUS X470-f STRIX Gaming (Ryzen) test system in the office. It’s a good companion to an SSD but you really notice it when reloading levels or other files from a mechanical hard drive – in particular, you notice it more when you need to access something on the hard drive that isn’t cached.
Generally
Overall, I felt that this would be the motherboard for me if I was making the investment into a 9th Generation Intel CPU but it would have to be a long term build. The whole experience from opening the box, through hardware installation, the easy ASUS Armoury Crate software installer and then daily use all felt premium and well-polished.
I thought 64GB of DDR4 was going to be excessive and it is, you could go with 32GB and if I was looking to save money on a system, this would be an area that I’d trim from our test setup. I’d also look into a 9700K processor but the Maximus XI Gene with all that it offers meets all my needs and those of the foreseeable future in a compact form factor that won’t dominate my desk area. I want a big monitor, not a big case.
Overclocking
When testing this out of the box on auto with the ASUS default settings, the resulting Cinebench scores were only slightly behind the ASRock Z390 Extreme4, but the Maximus XI Gene also didn’t draw as much power during the process, nor were the CPU and VRM temperatures as high. Manufacturers’ use of ‘AUTO’ in BIOS performance settings has made the task of comparing motherboards more difficult when seeking an even comparison, due to their different implementations and design decisions.
We achieved the same overclock of 4.9GHz (all cores) and 5GHz(3 cores)/4.9GHz (5 cores) on our Intel i9-9900K on both the Maximus Gene and the ASRock Z390 Extreme4. Synthetic benchmarks were within margin for error between the two Z390 boards and gaming benchmarks (in-game benchmarks) were virtually identical between the averages over 3 runs. The 4.9GHz overclock across all cores was benchmark stable whilst the 5GHz blended overclock was game stable. My all-core 5GHz overclock across all cores was boot stable but not reliable beyond that and the CPU temperatures were too high for my liking with our review setup.
Memory compatibility wasn’t an issue either and I was able to run the G.SKILL 3200MHz FlareX kit, the G.SKILL SniperX 3400MHz kit plus the G.SKILL TridentZ RGB Double Capacity 3200MHz kit.
There was a notable difference when I went into the BIOS and deliberately disabled the AUTO performance tweaks and let the Maximus XI Gene implement and apply the Intel specification to the i9-9900K. Whilst this isn’t something that anyone would want to do, having spent ~$900 AUD on a CPU, it is easy to apply the stock settings in the ASUS BIOS whereas it wasn’t on the ASRock.
The ASUS BIOS defaults will deliver a well-balanced experience with the VRMs only getting hot under excessive benchmarks and Blender runs. The CPU remained warm but not hot when using the ASUS defaults.
When tweaking the BIOS options a little to give the i9-9900K a bit of room to let its hair down without making an ‘overclock attempt’, we saw performance per the ASRock Z390 Extreme4 defaults with CPU temperatures to match but interestingly the VRM heatsinks of the Maximus XI Gene were cooler to touch. I couldn’t get an accurate temperature reading but it’s fair to say that I could touch the ASUS VRM heat sink for longer after 30 minutes of a Blender run than I could with the ASRock Z390 Extreme4.
Our test bench case is the open air Thermaltake Core P3 Curved TG case but I didn’t use the glass panel for this testing. When I simulated case airflow over the heatsinks, the difference was noticeable so the VRM cooling measures are both effective and stylish. If you are looking to buy this motherboard, make sure that you have reasonable airflow – it doesn’t have to be a wind tunnel but a low level of constant air movement over the VRM heat sinks will be appreciated by the system.
Pricing
There is an elephant in the room and it’s a big one … the price. The street price of $599 reflects the premium offering but is likely to be out of reach for many consumers – especially when you look at the 9th generation Intel CPU pricing. The price has a sting in the tail, no doubt about it but this is the most perfect Micro ATX motherboard I’ve seen from a feature, design and performance perspective so buyers are getting tangible benefit – this is not a matter of paying extra for a ‘name’ or status symbol.
Final thoughts
If I was building a Z390 system then I’d be going ‘all out’ and wanting a board I could both punish and rely on for years to come. There is an initial sting with the price but in a year or so that will be long forgotten. The appreciation for the included features and ease of use will continue for the operational life of the platform – if the older Z87 Maximus VI Gene is anything to go by this is likely to be 5+ years.
As a motherboard, I can’t see what else ASUS could have added or done differently to make the MAXIMUS XI GENE a better product. It’s as close to perfection as you’re likely to see with well-considered layout design, impeccable build quality, high-end audio, extensive connectivity and enthusiast performance.
The visibility and control over power, thermals and general performance is incredible. Whilst most vendor-provided utilities are of minimal value, the ASUS ROG software suite is actually useful and provides legitimate value – particularly RAMCACHE III for an even more responsive experience.
This is my second favourite motherboard currently available today, sitting just behind the ASUS ROG X399 Zenith Extreme for Threadripper CPUs. I like both motherboards for exactly the same reasons and also appreciate the consistency in the design and execution across the different platforms.
Personally, if I was building a 9th generation Intel system at the moment I’d find a way to afford/include this motherboard in the specification.
| ASUS ROG MAXIMUS XI GENE | |
|
|
|
|
PROS |
|
|
CONS |
– The price of an almost perfect motherboard is going to be too high for most people |
| Awards | 
|


